Finance
Finance manual
- Introduction
- Dashboard
- Receivable
- Customer
- Payable
- Supplier / Employee
- Introduction
- Create Supplier
- Update Supplier / Employee
- View Supplier / Employee
- Pay Supplier / Employee
- Expense
- Introduction
- Create Expense
- Update Expense
- View Expense
- Submit Expense
- Retract Expense
- Approve Expense
- Recurring Expense
- Bank Account
- Loan
- Investment
- Report
- Tool
Introduction
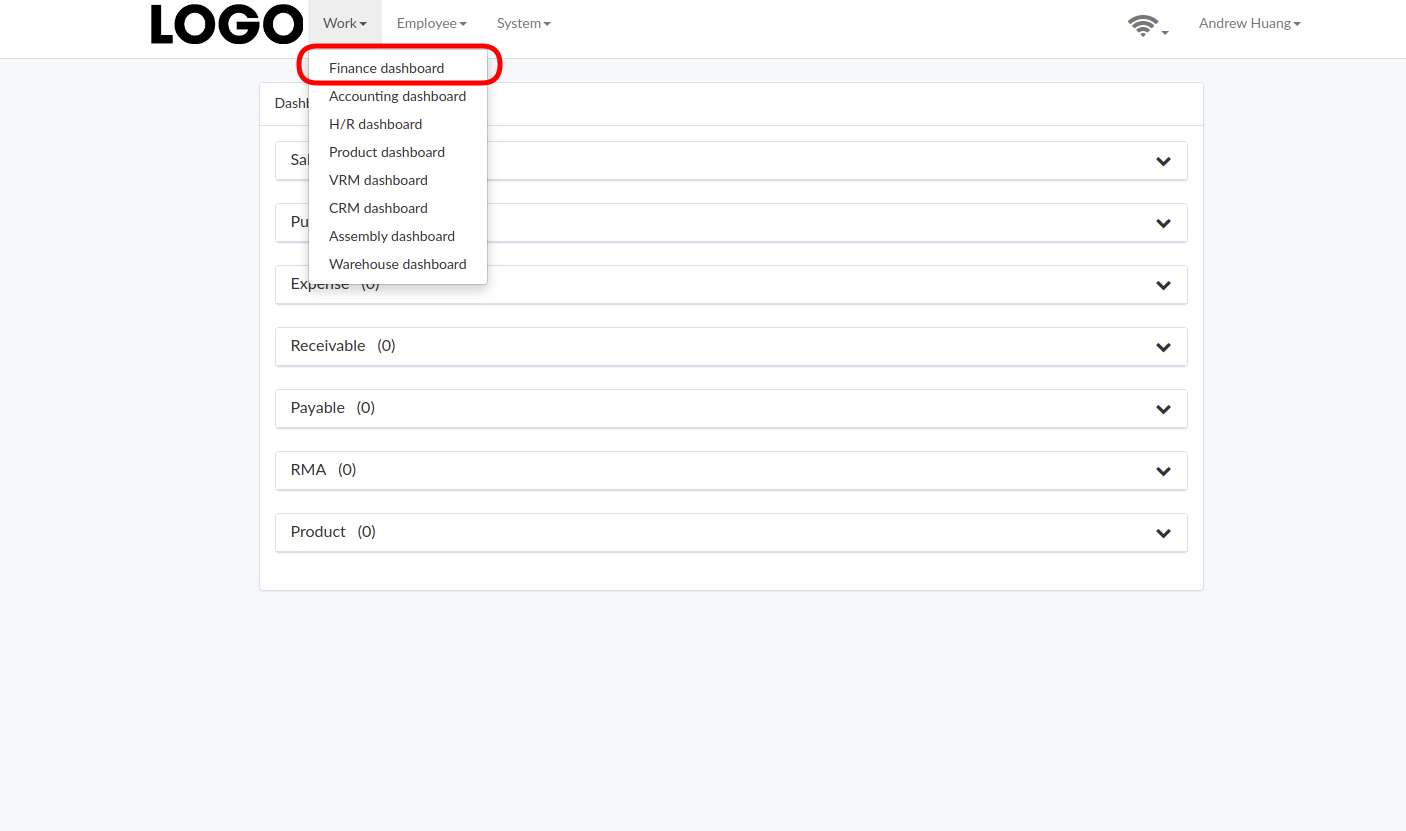
Finance dashboard can be found under "Work" menu
Dashboard
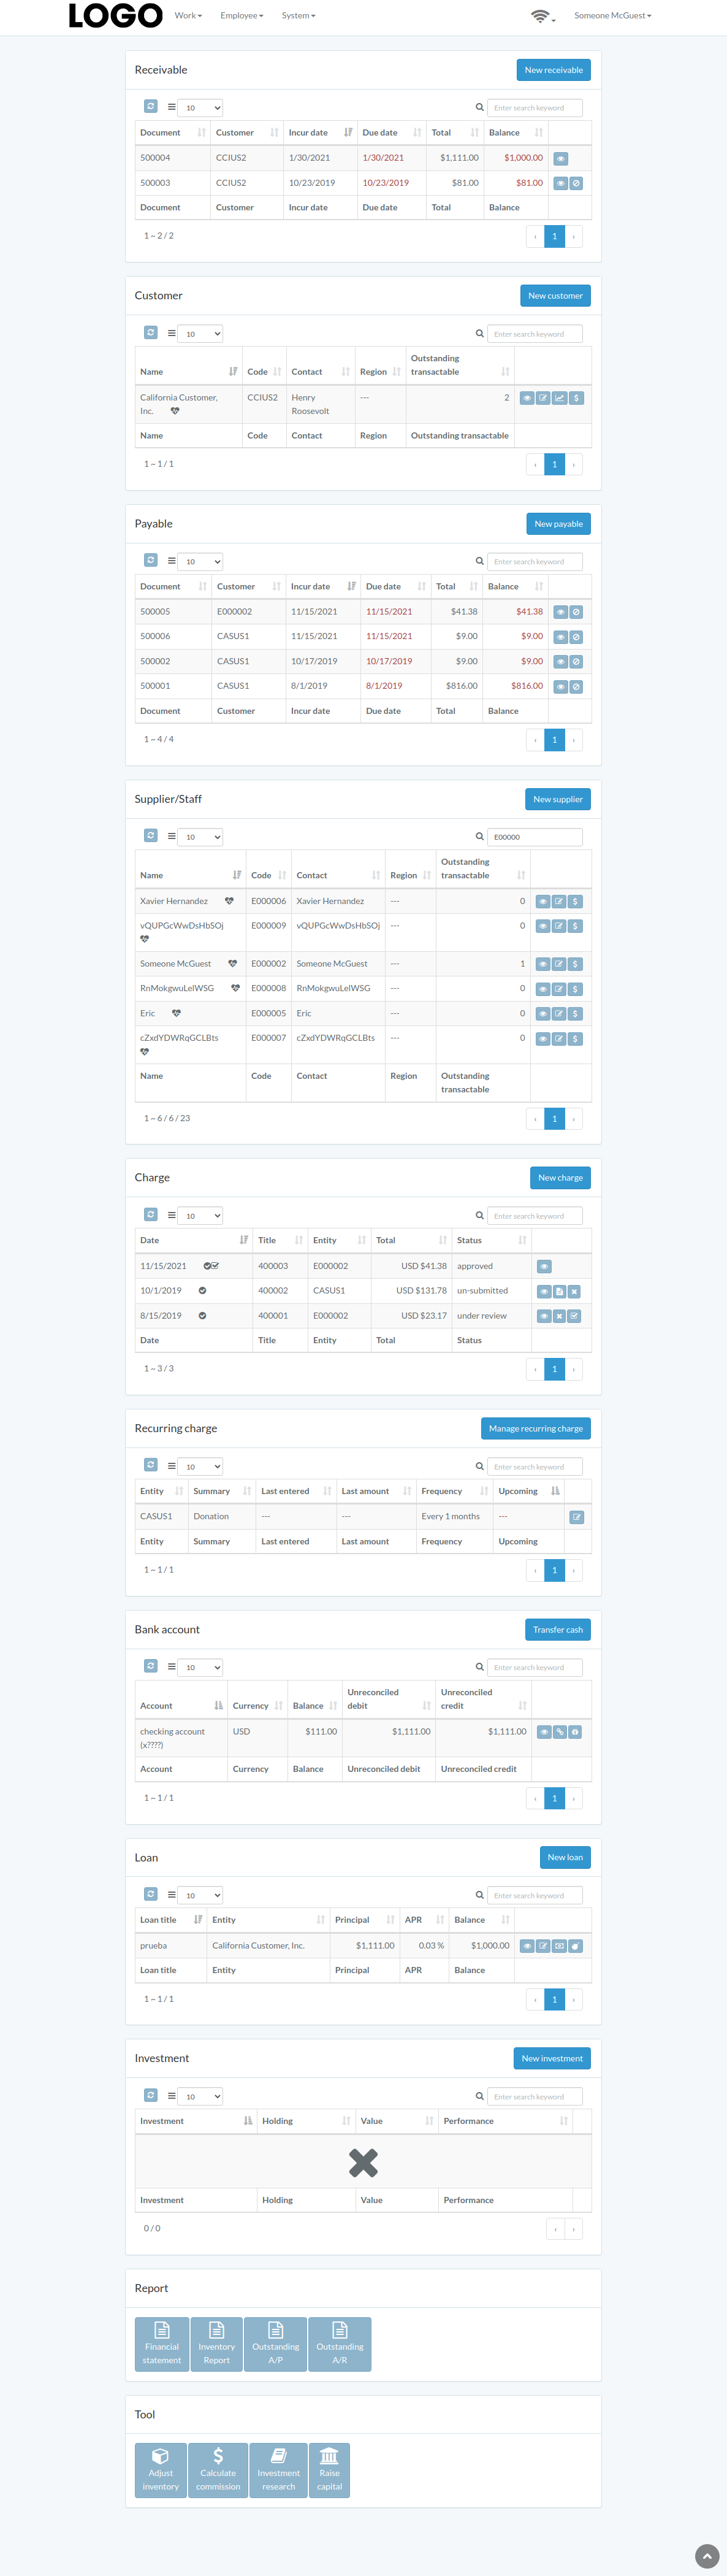
Following is an example dashboard
There are several major sections; Receivable, Customer, Payable, Supplier/Staff, Charge, Recurring-charge, Bank-account, Loan, Investment, Report, Tool.
Some sections may not be available from customization
Receivable
Introduction
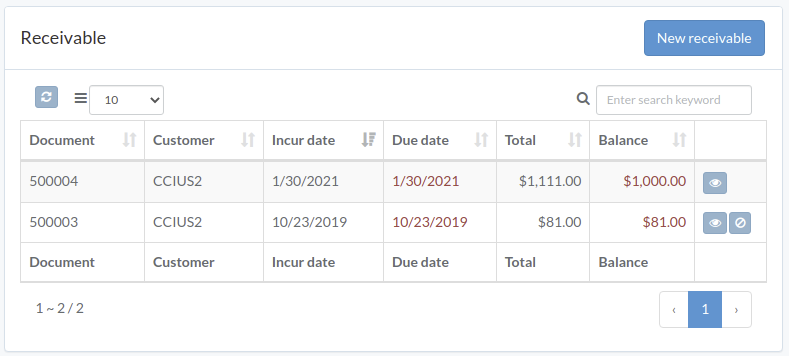
Following shows a sample window.
The chapter describes features available within the window.
Create Receivable
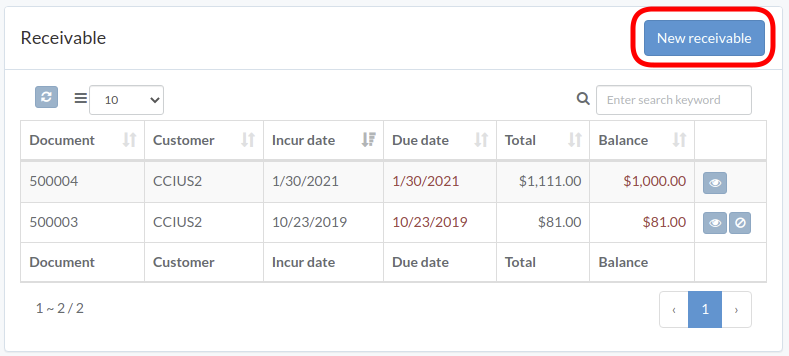
Click "New receivable" on upper right corner of receivable table
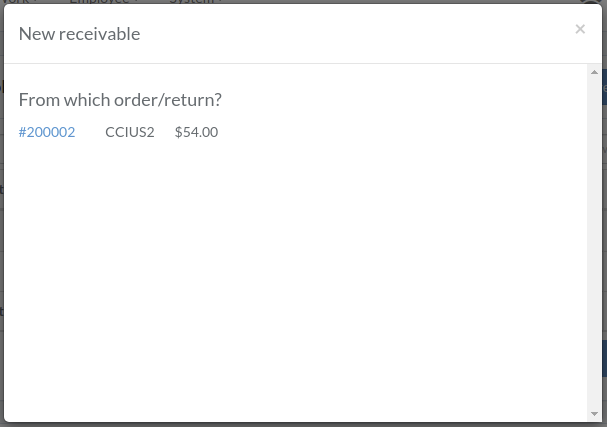
Click on title of which receivable should be generated from
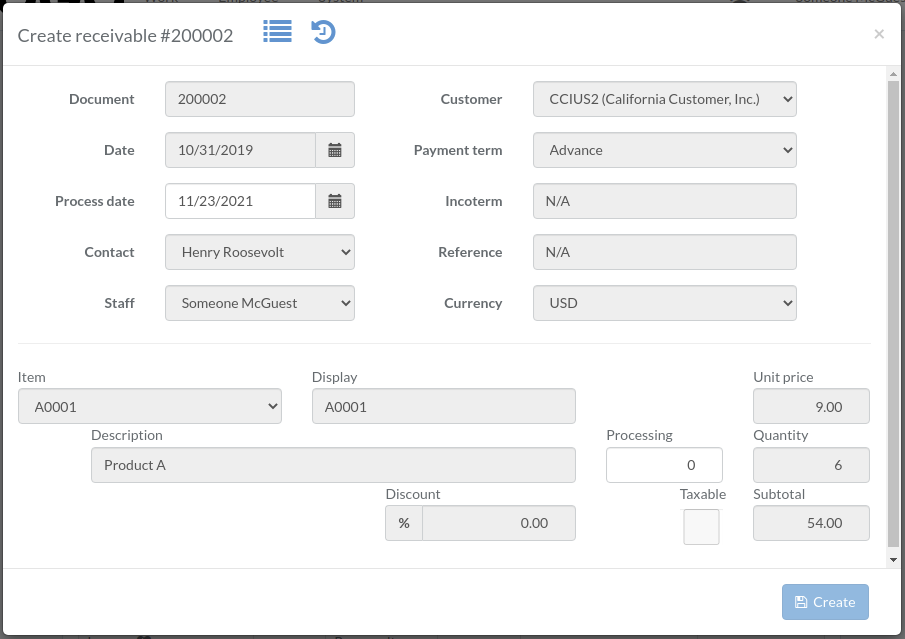
Enter incur-date and processing quantity, then click "Create".
View Receivable
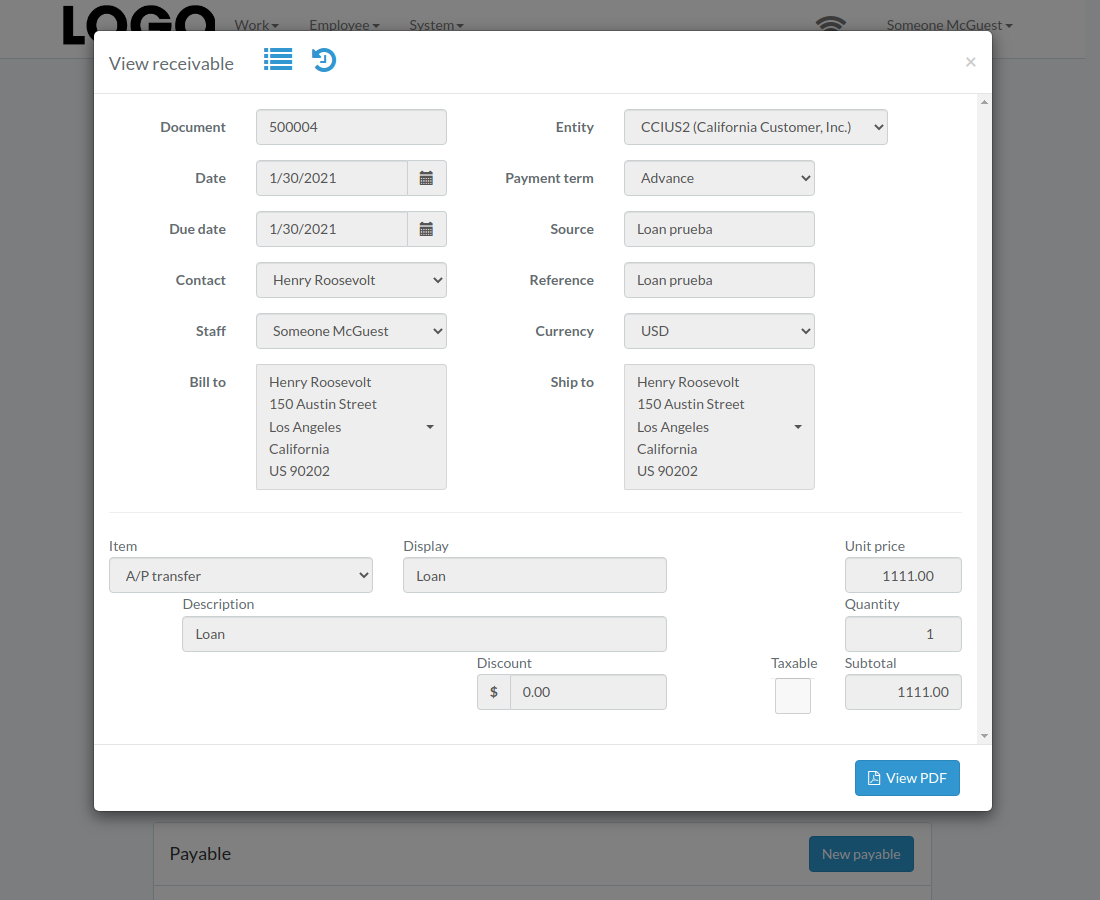
Click "View" button on the right of receivable
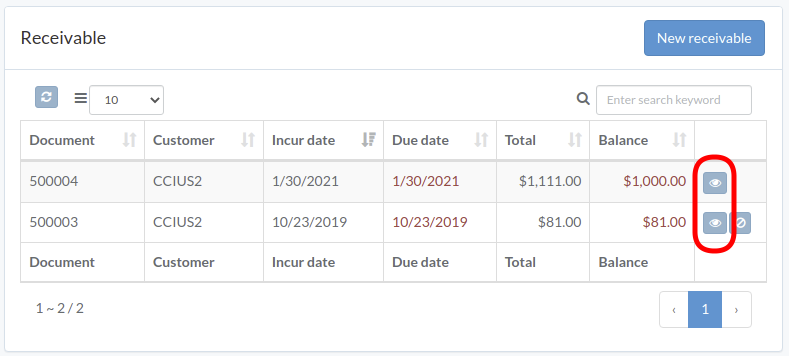
Receivable modal appears
Void Receivable
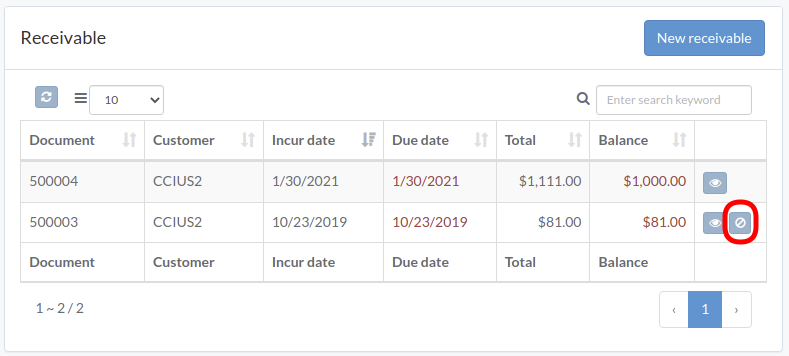
Click "Void" button on the right of receivable
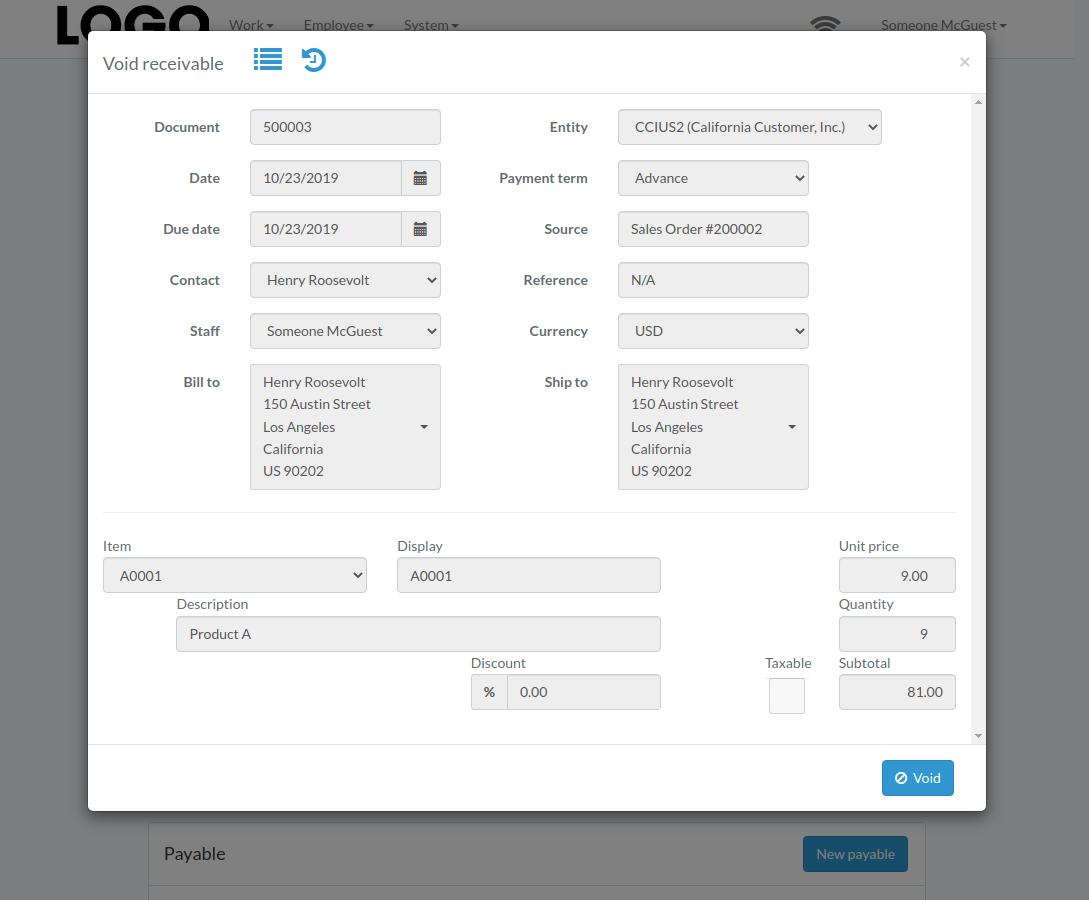
When receivable modal appears, click "Void" button to confirm
Customer
Introduction
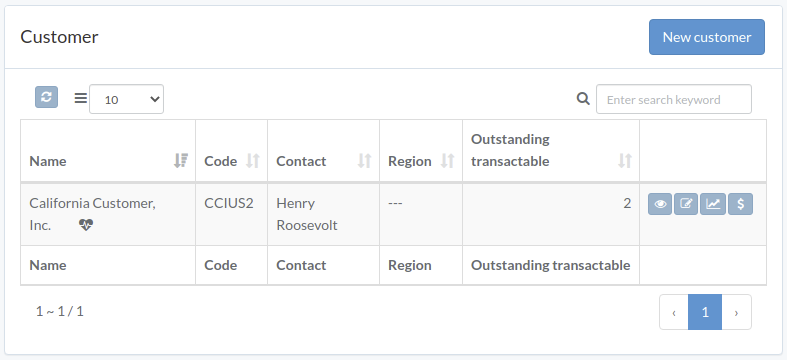
Following shows a sample window.
The chapter describes features available within the window.
Create Customer
Click "New customer" on upper right corner of customer table
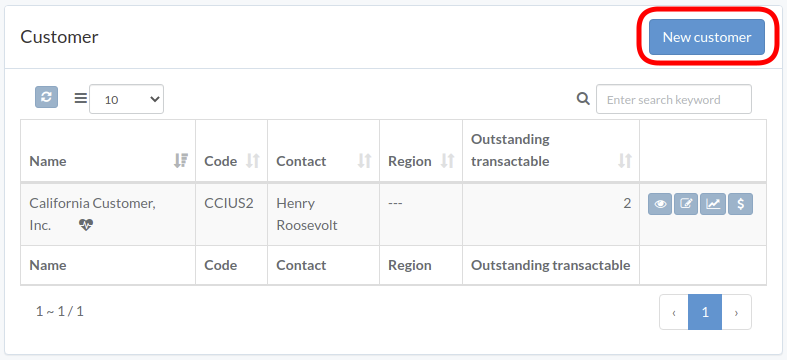
Enter customer data, then click "Create".
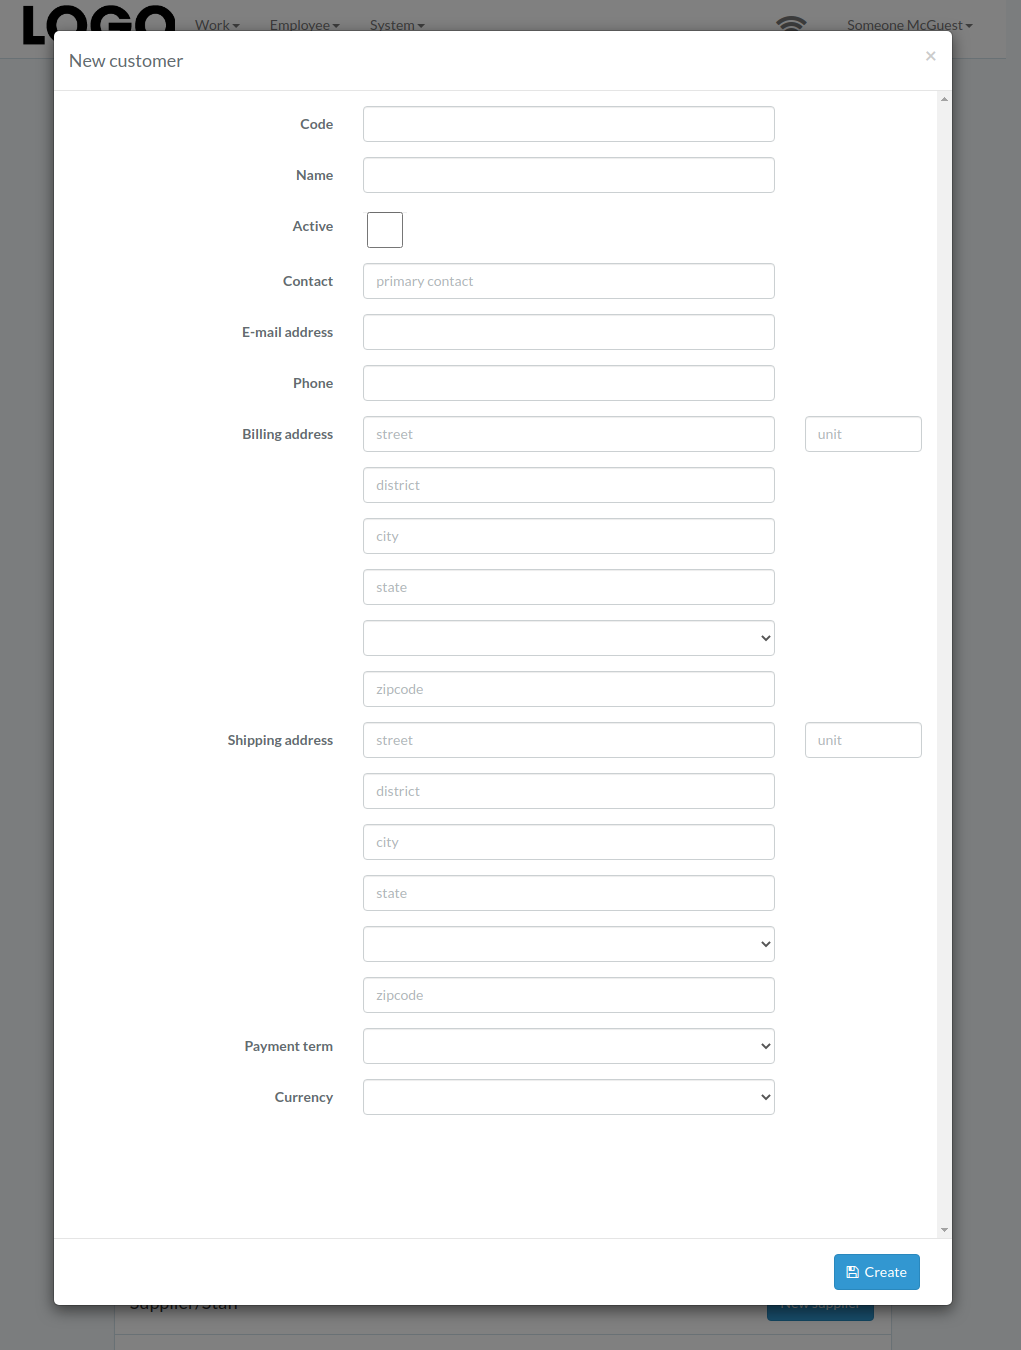
Update Customer
Click "Update" button on the right of customer
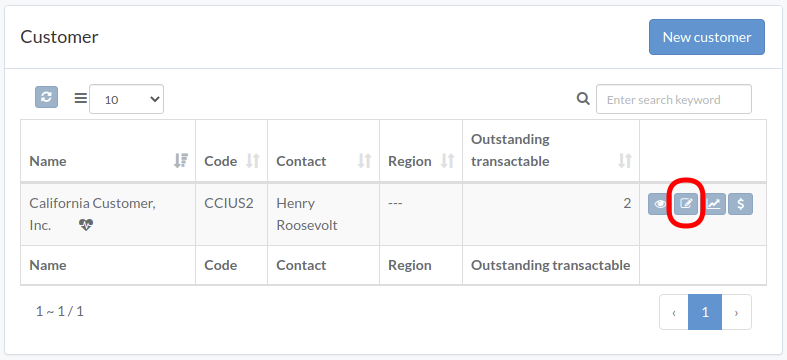
Update information, then click "Update".
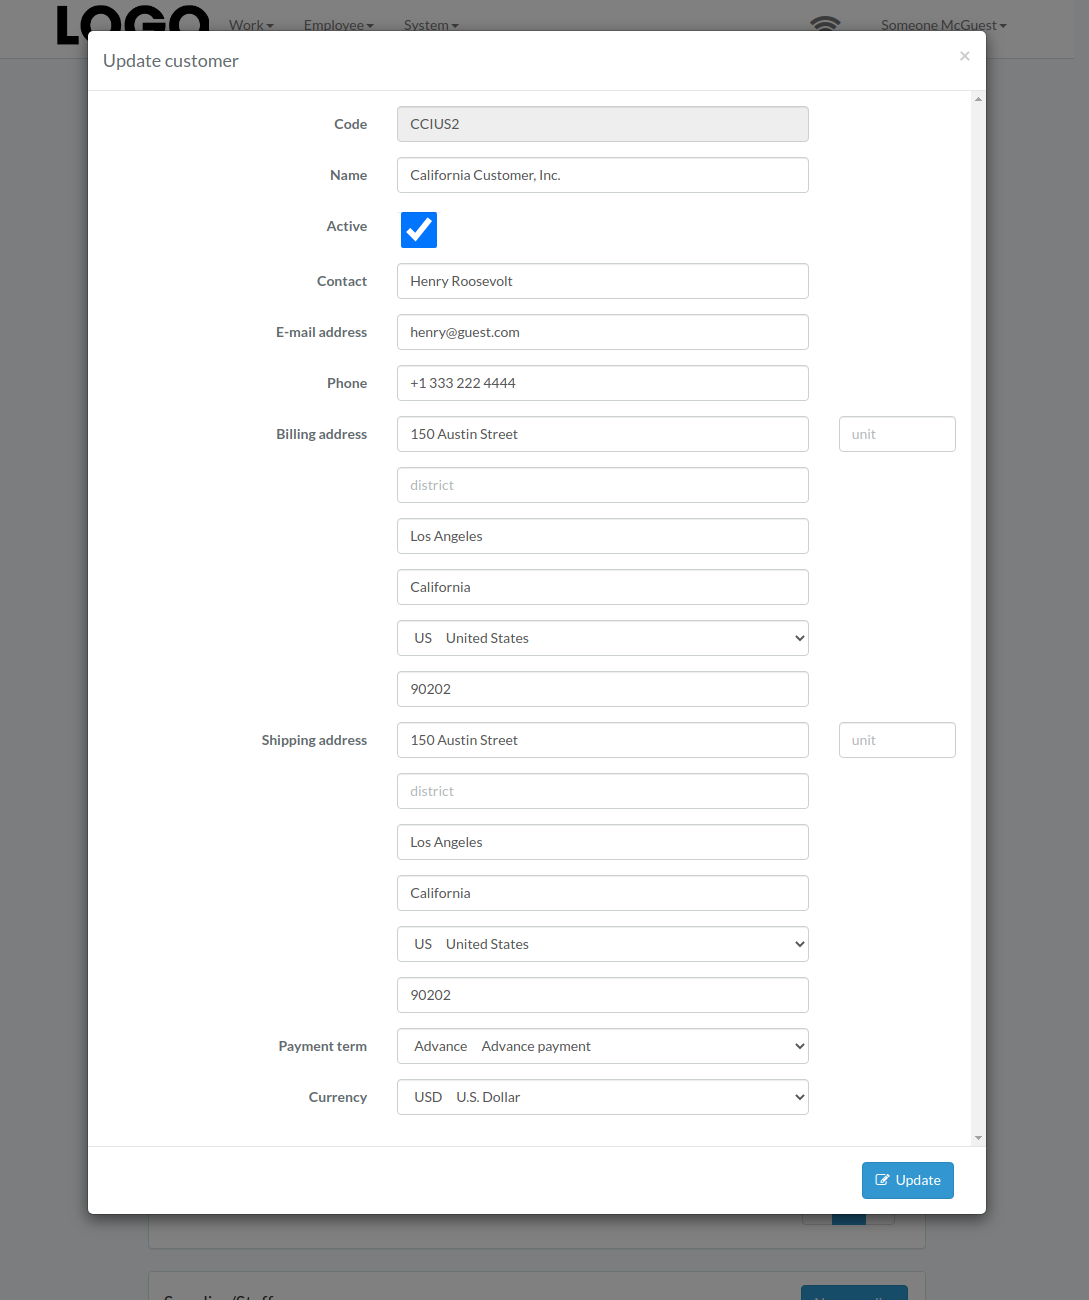
View Customer
Click "View" button on the right of customer
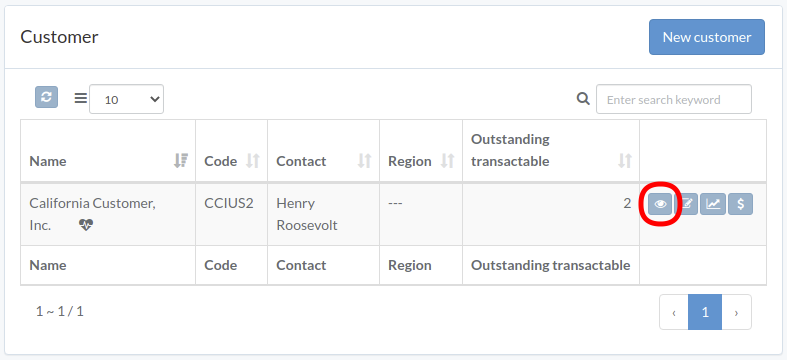
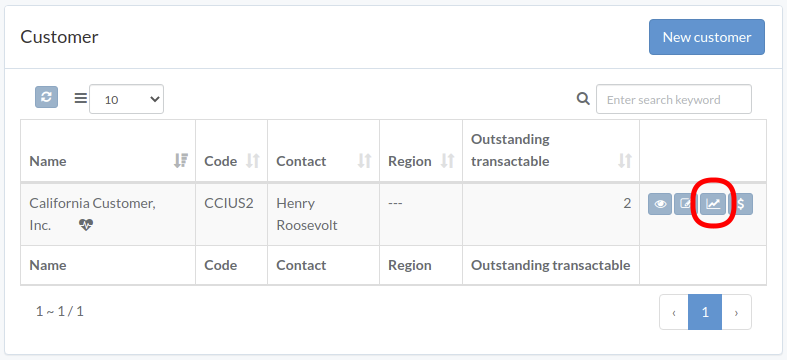
Customer modal appears
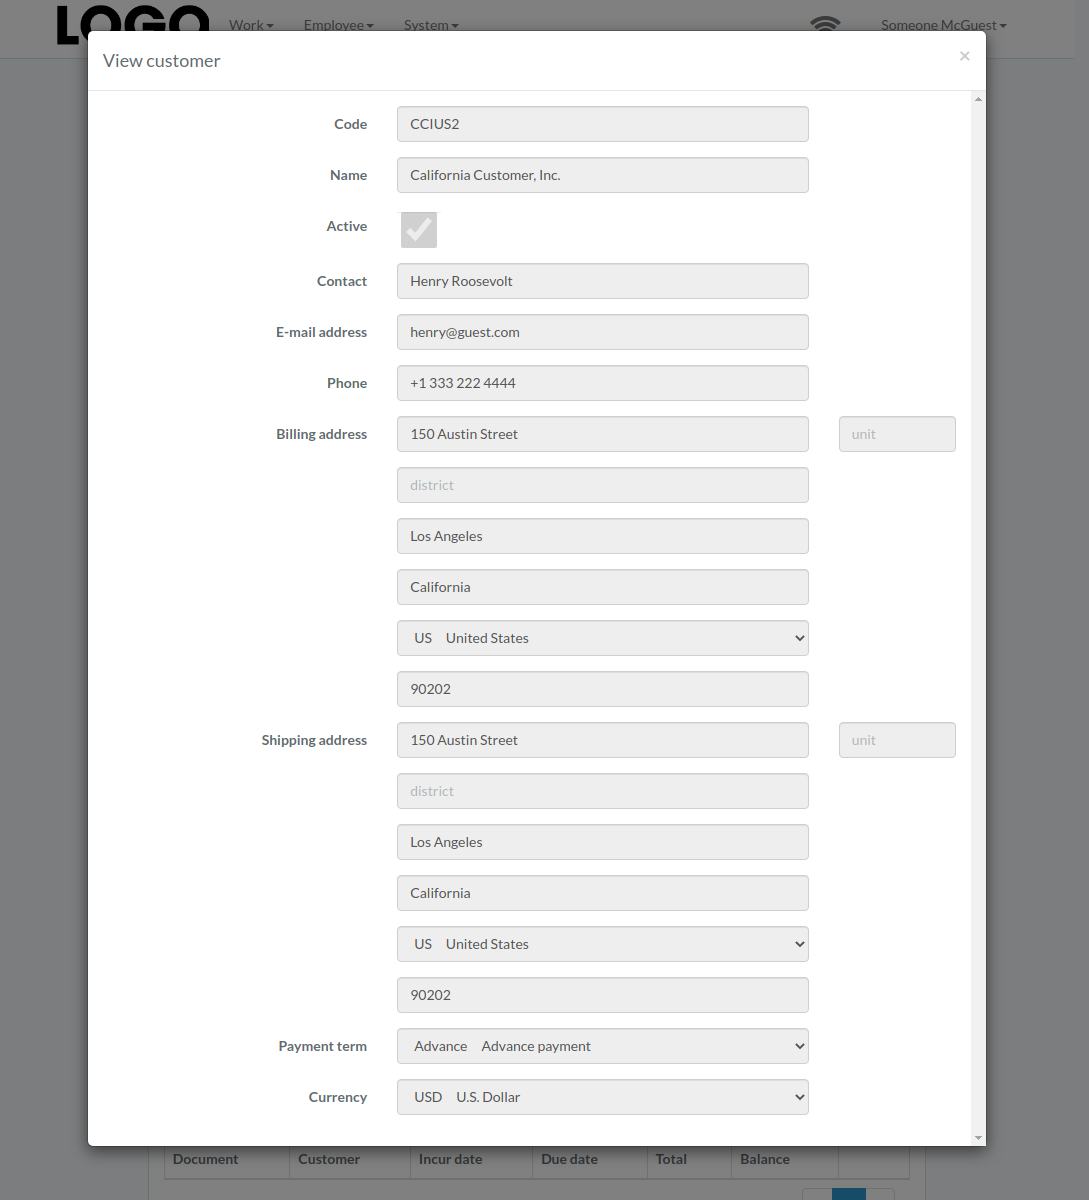
Customer Performance
Click "View" button on the right of receivable
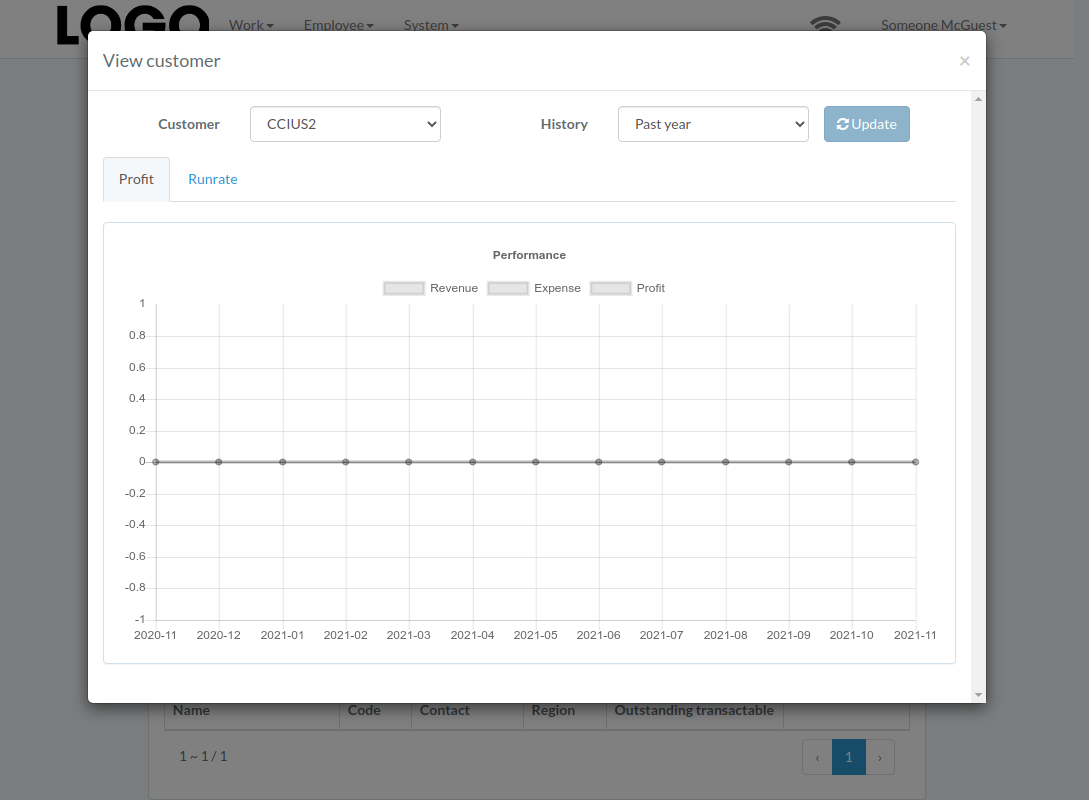
Performance modal appears
Receive Payment
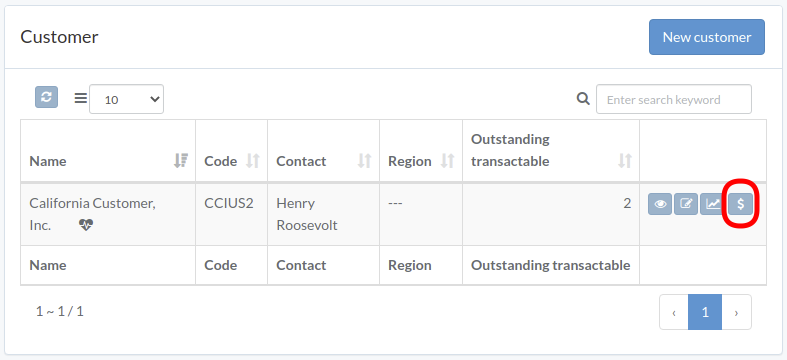
Click "Receive" button on the right of customer
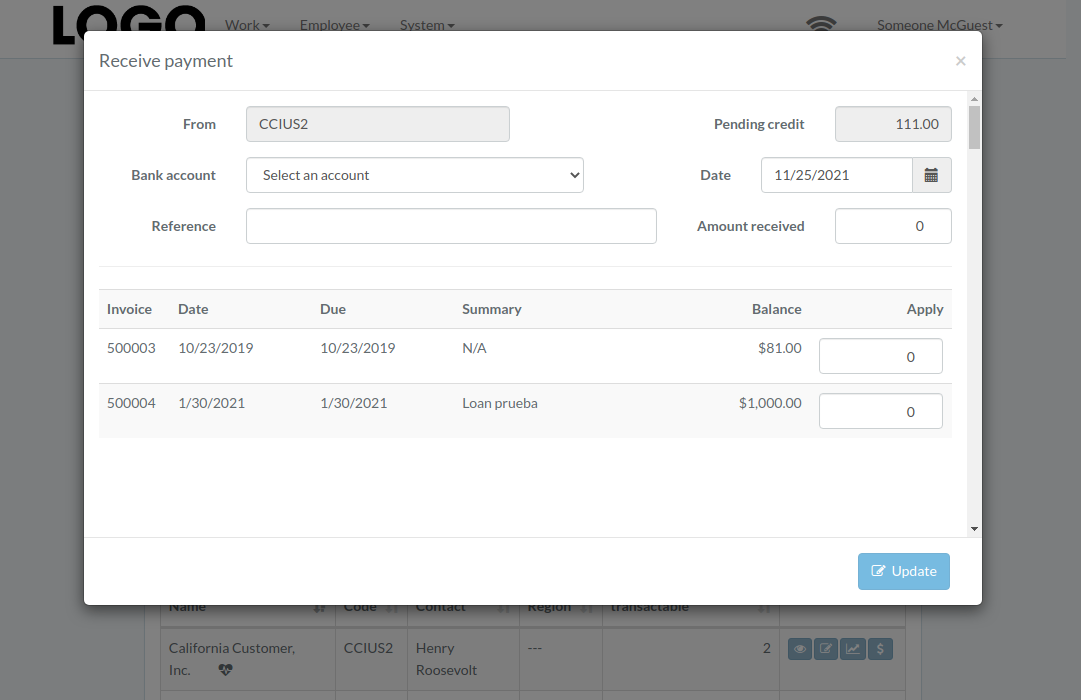
Enter date, bank-account, received-amount, applied-amount, etc., then click "Update"
Payable
Introduction
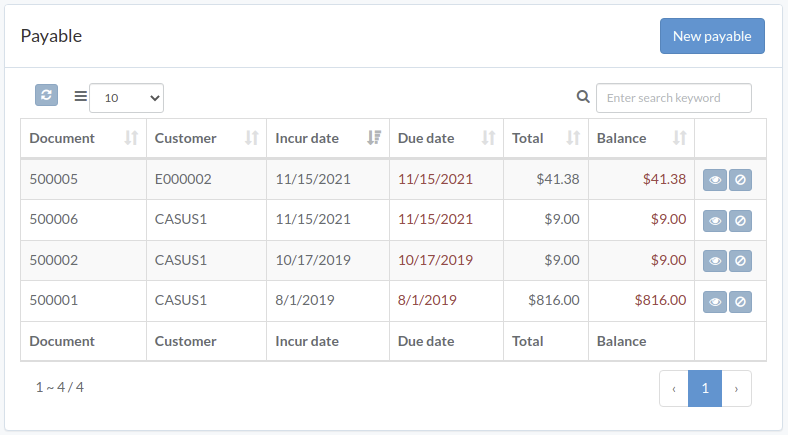
Following shows a sample window.
The chapter describes features available within the window.
Create Payable
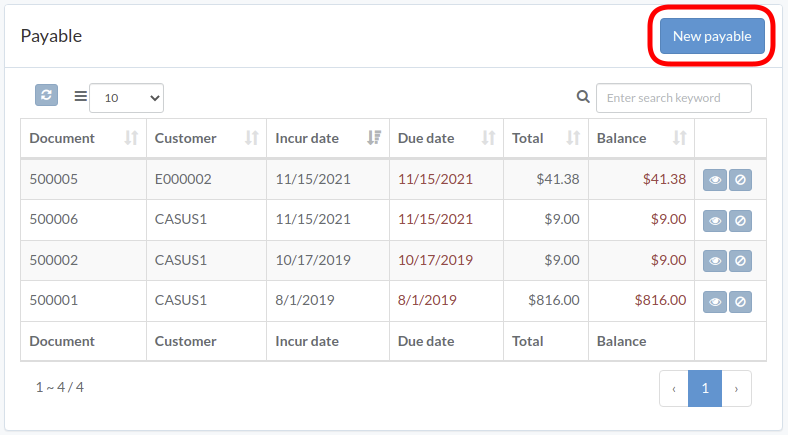
Click "New payable" on upper right corner of payable table
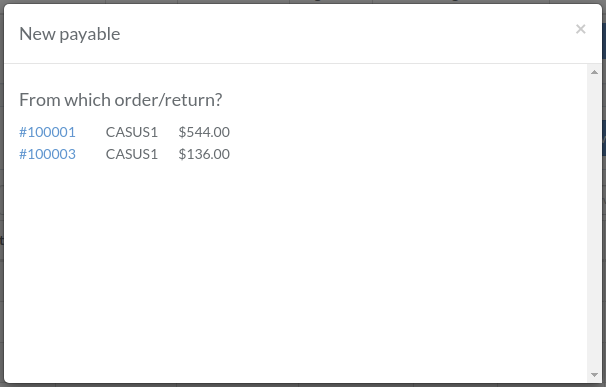
Click on title of which payable should be generated from
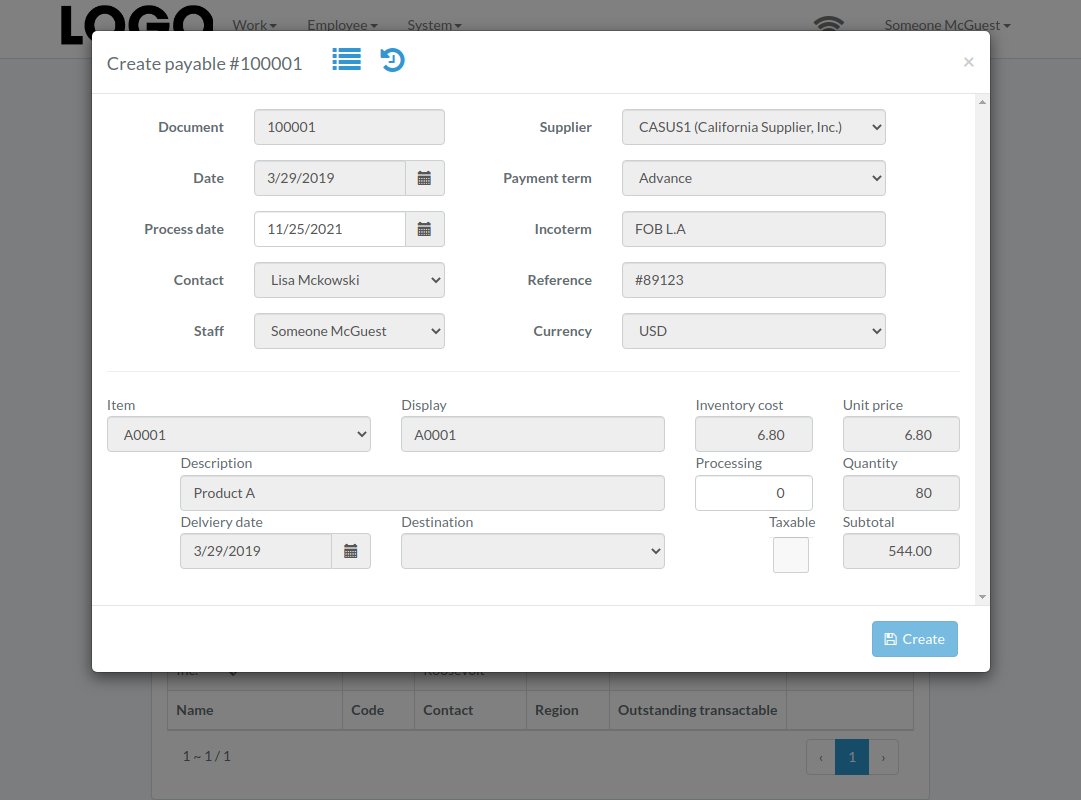
Enter process-date and processing-quantity, then click "Create".
View Payable
Click "View" button on the right of payable
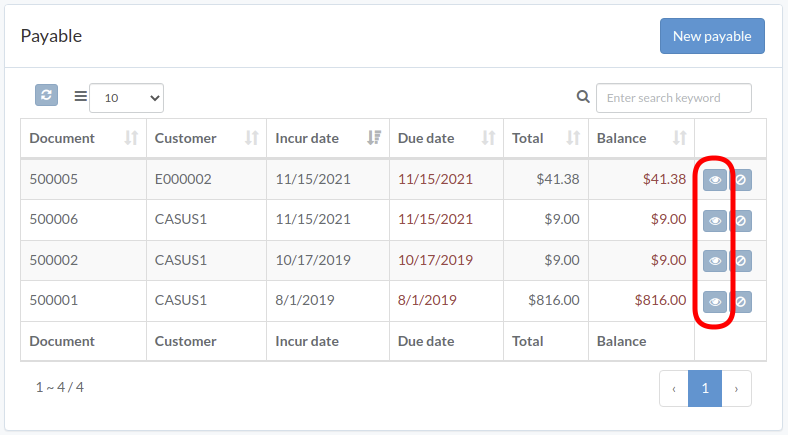
Payable modal appears
Void Payable
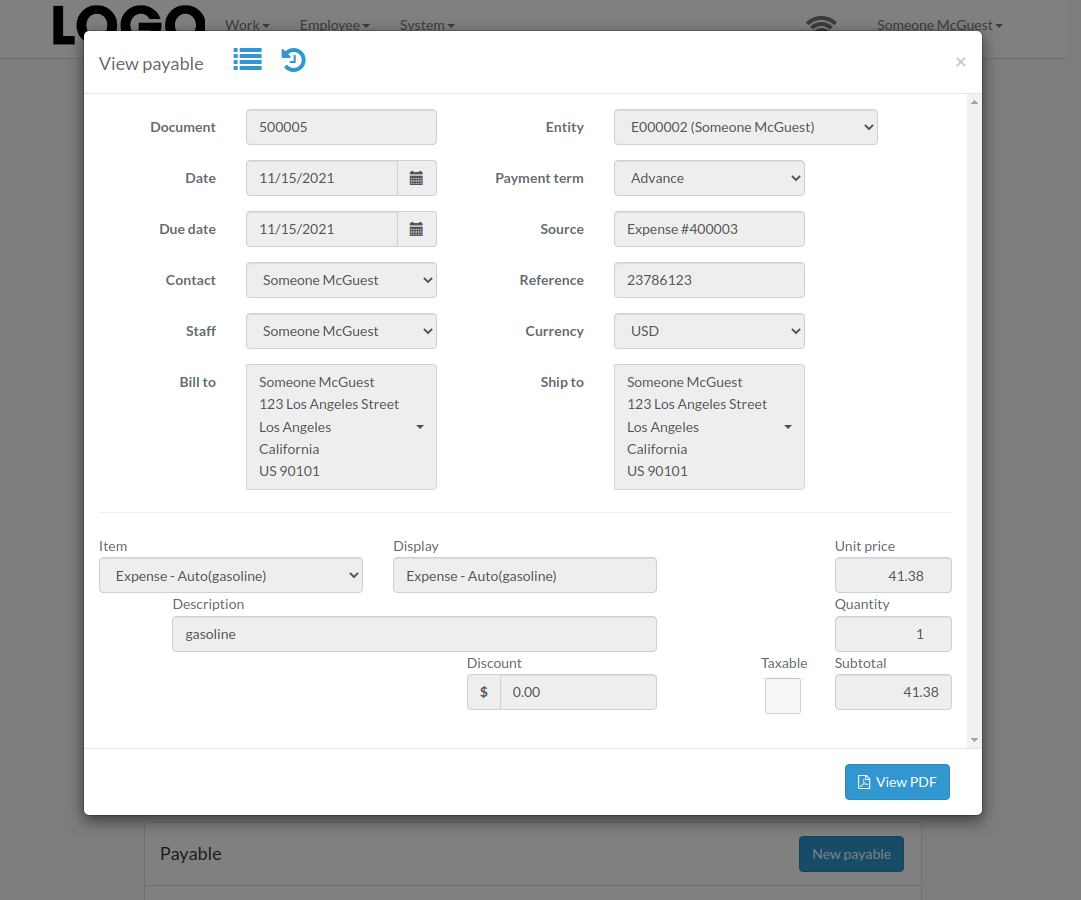
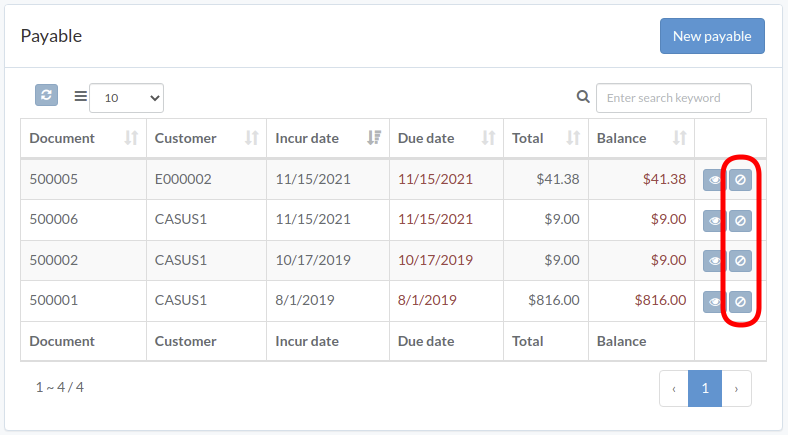
Click "Void" button on the right of payable
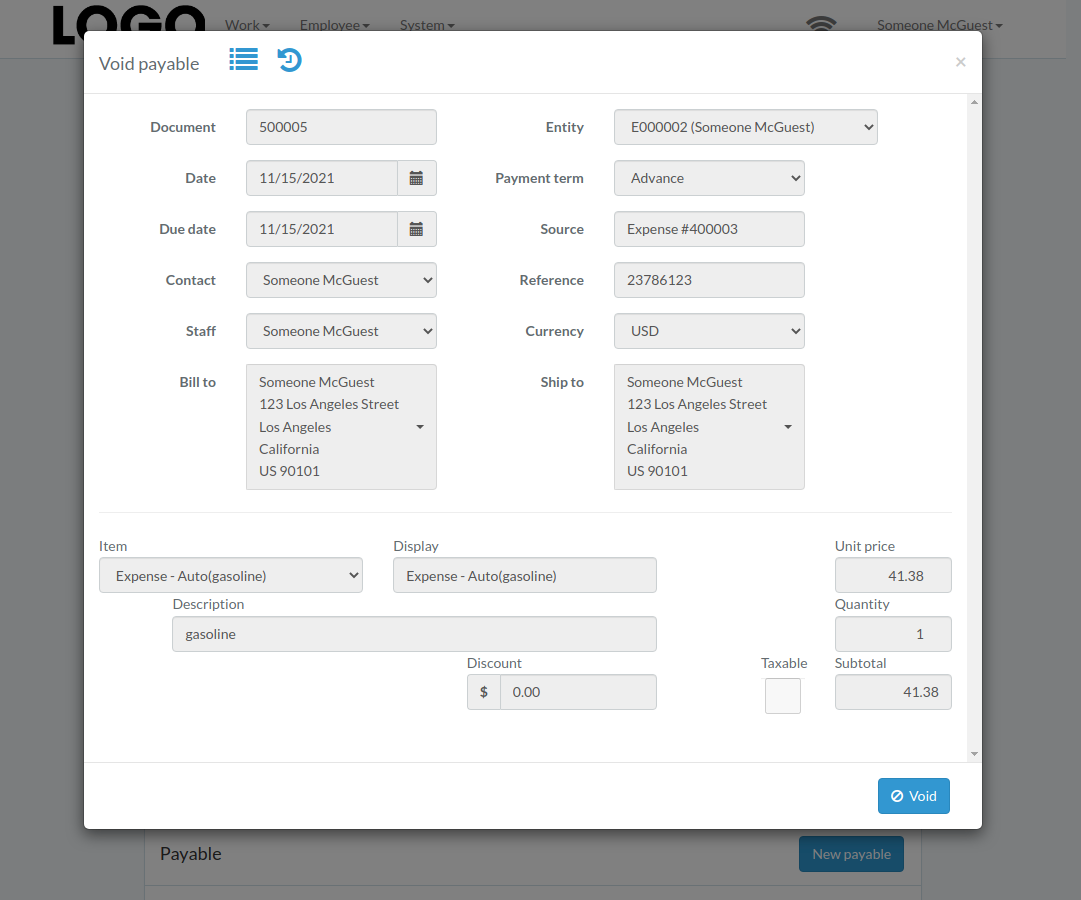
When payable modal appears, click "Void" button to confirm
Supplier / Employee
Introduction
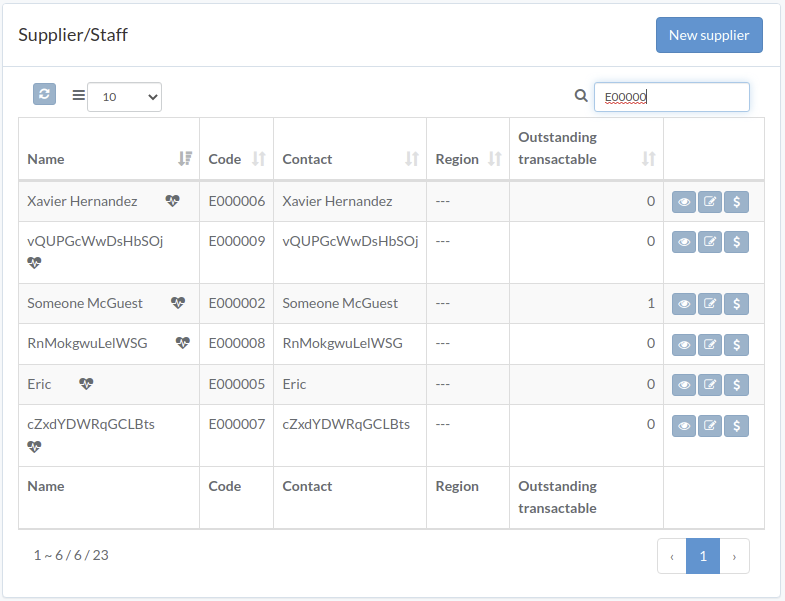
Following shows a sample window.
The chapter describes features available within the window.
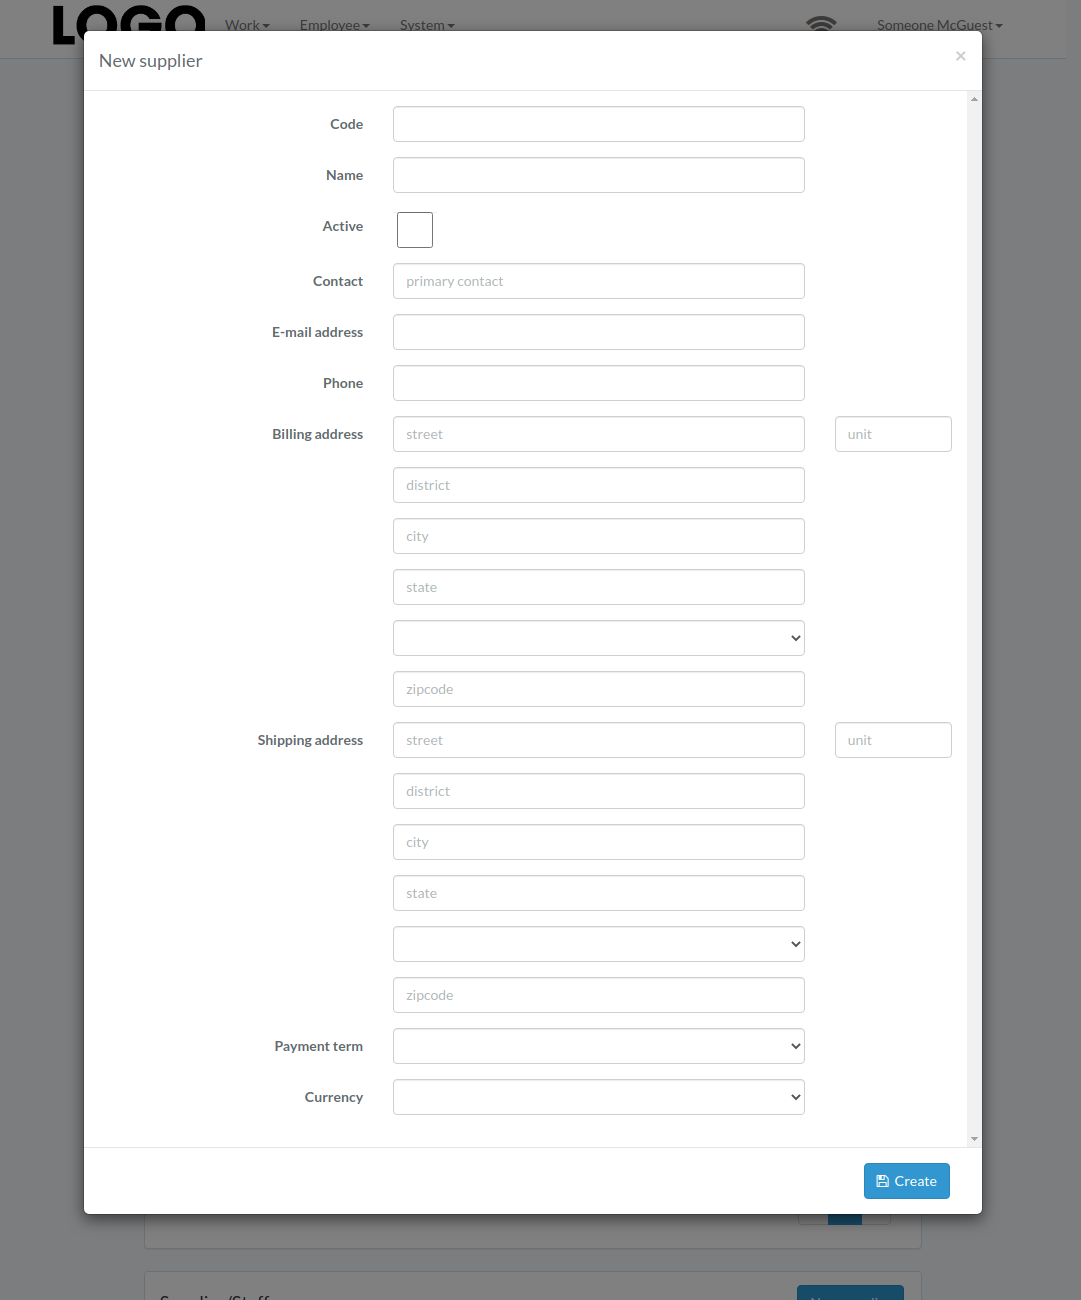
Create Supplier
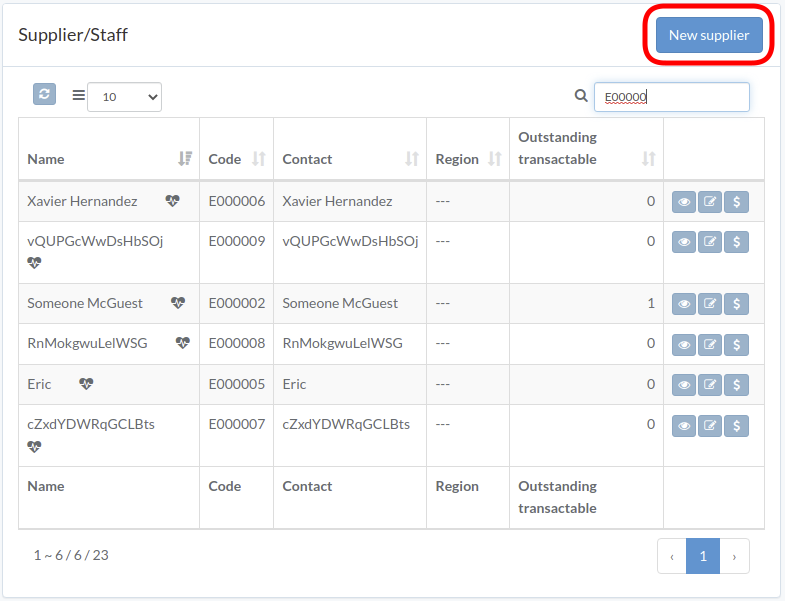
Click "New supplier" on upper right corner of Supplier/Staff table
Enter supplier data, then click "Create".
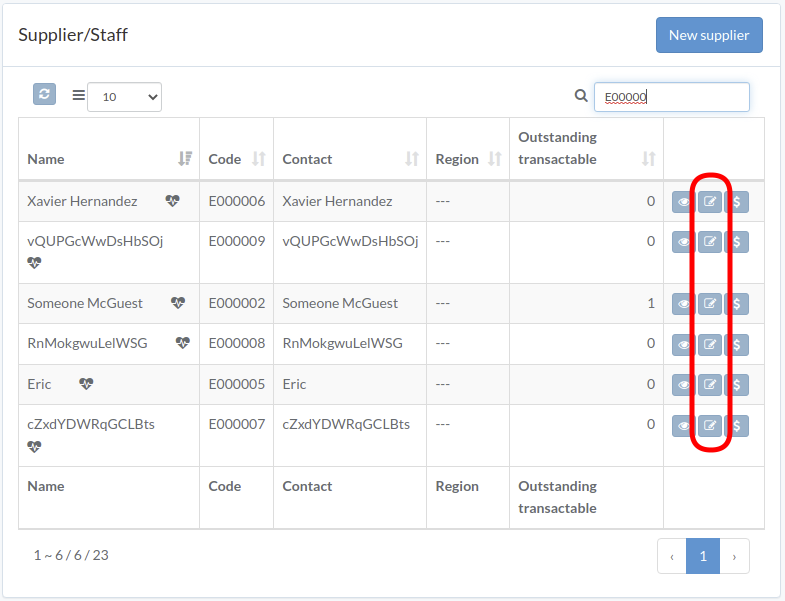
Update Supplier / Employee
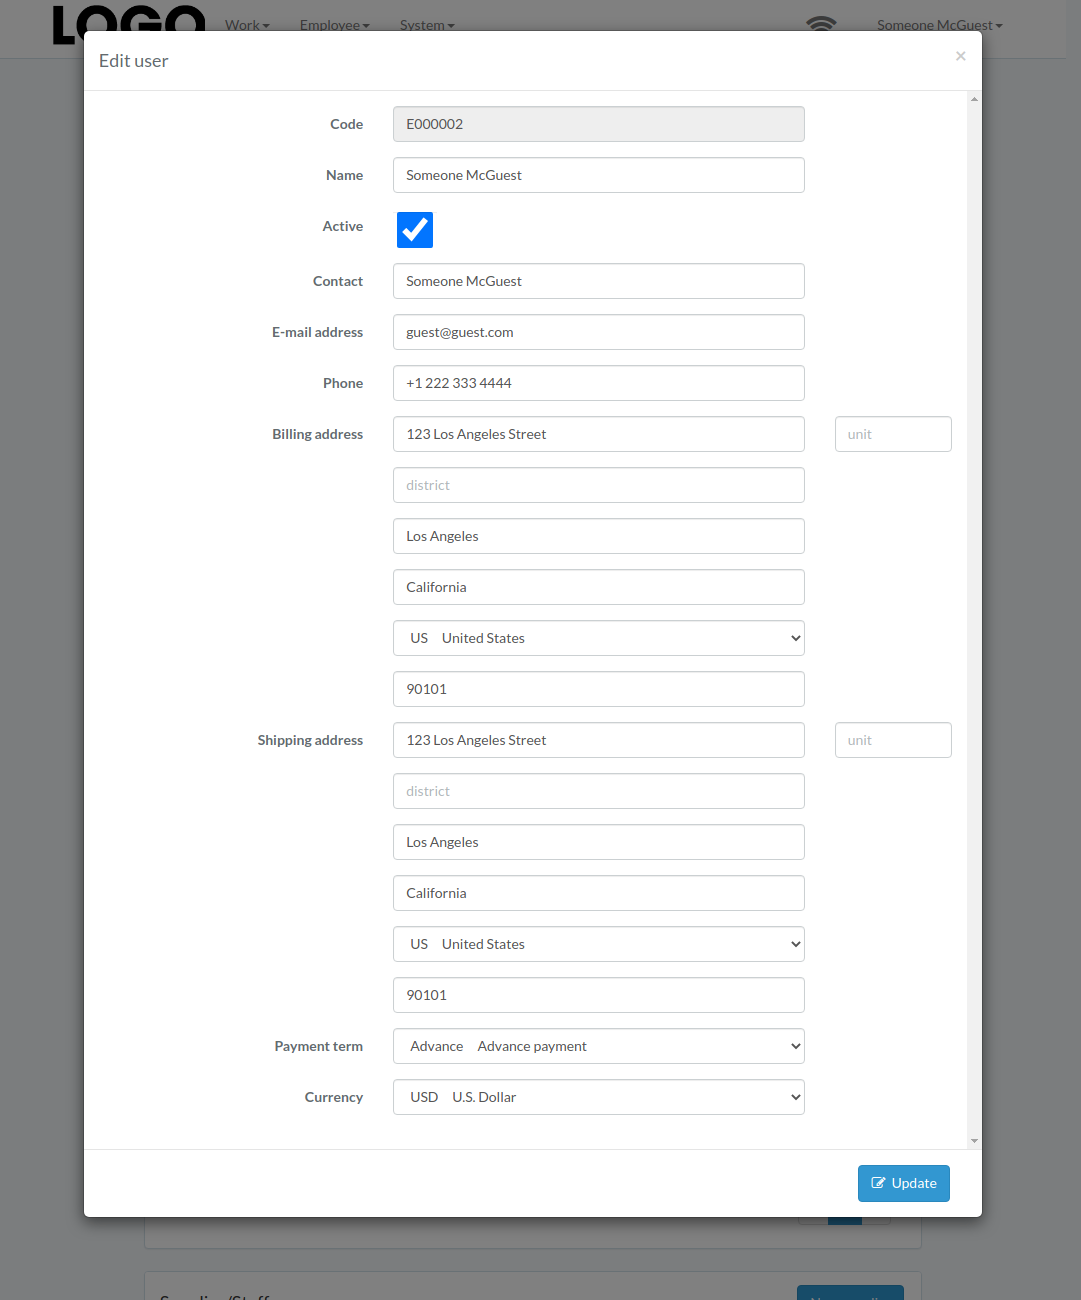
Click "Update" button on the right of supplier
Update information, then click "Update".
View Supplier / Employee
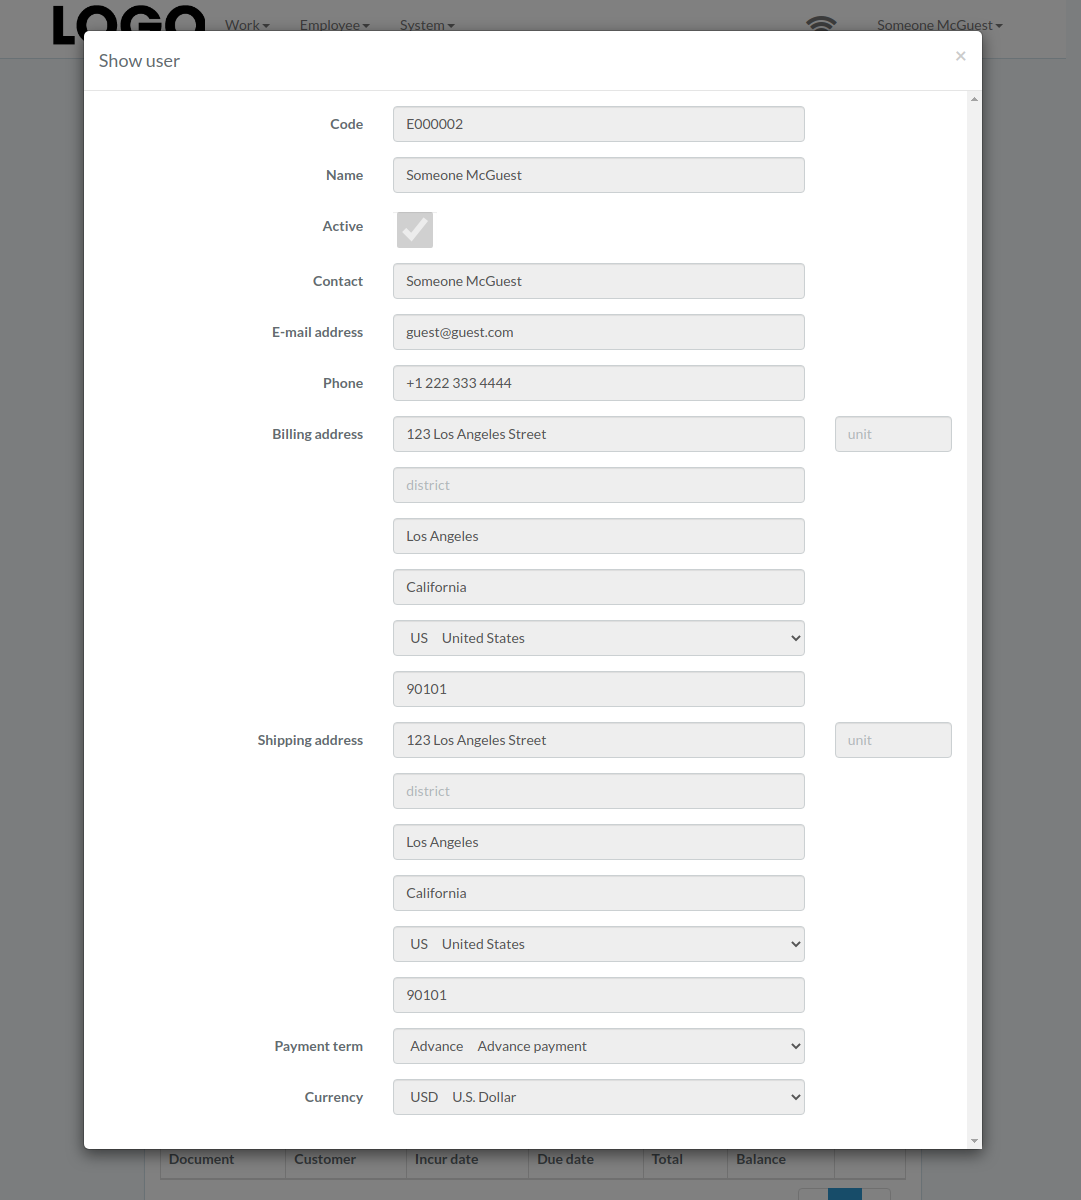
Click "View" button on the right of supplier
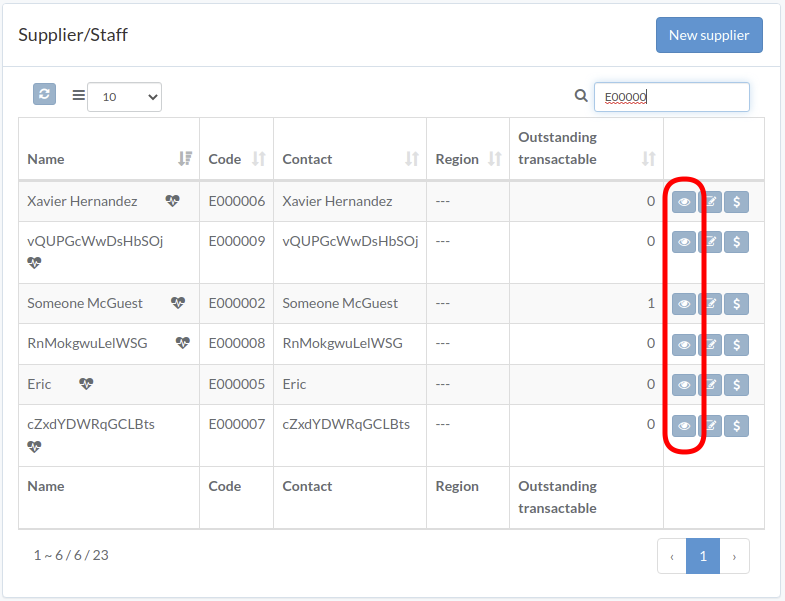
Supplier modal appears
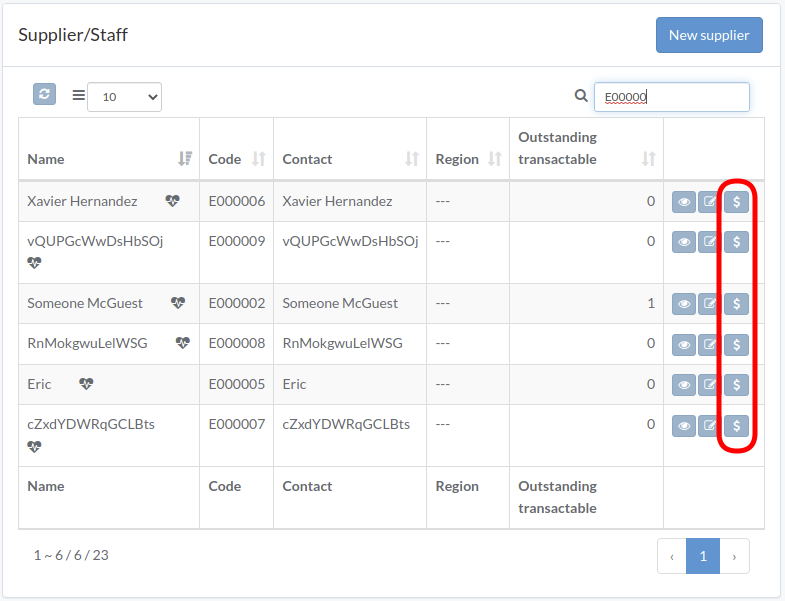
Pay Supplier / Employee
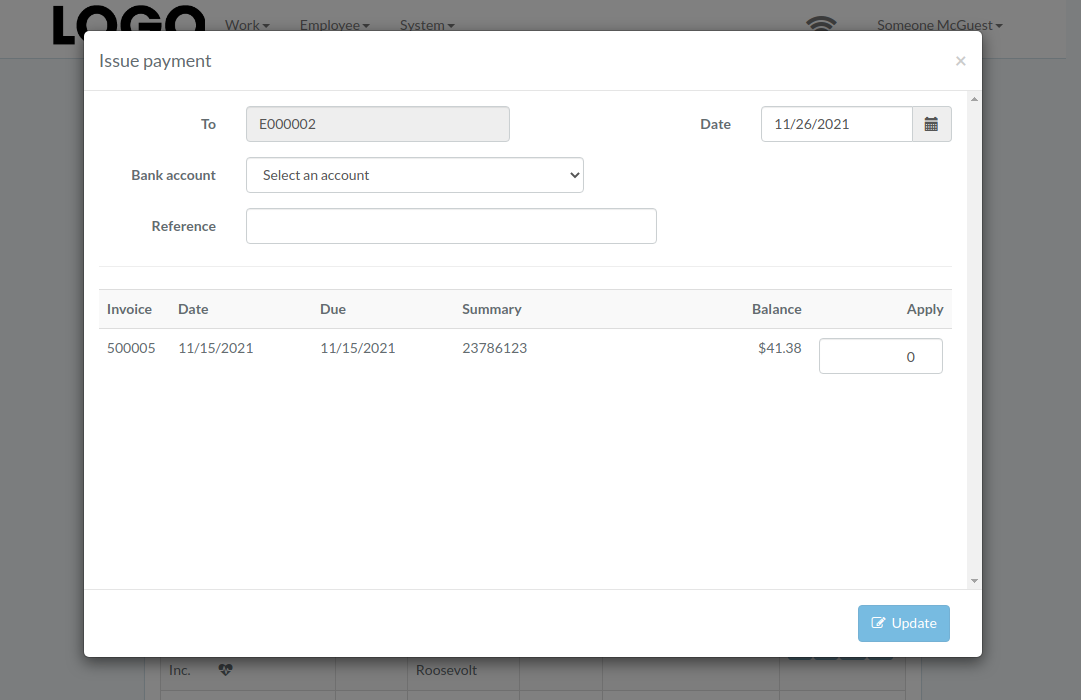
Enter date, bank-account, pay-amount, etc., then click "Update"
Expense
Introduction
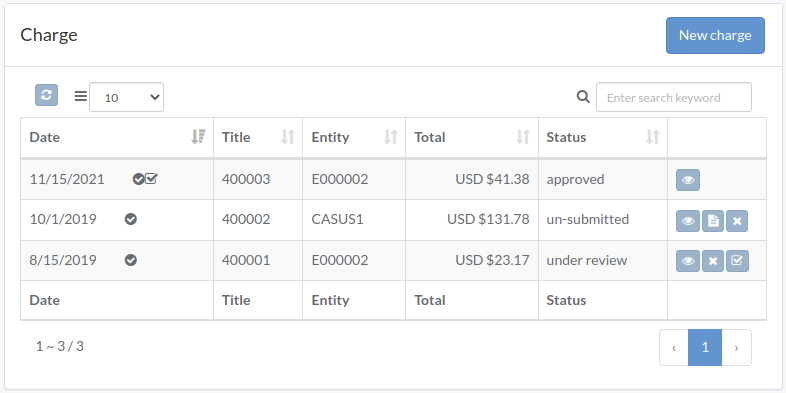
Following shows a sample window.
The chapter describes features available within the window.
Create Expense
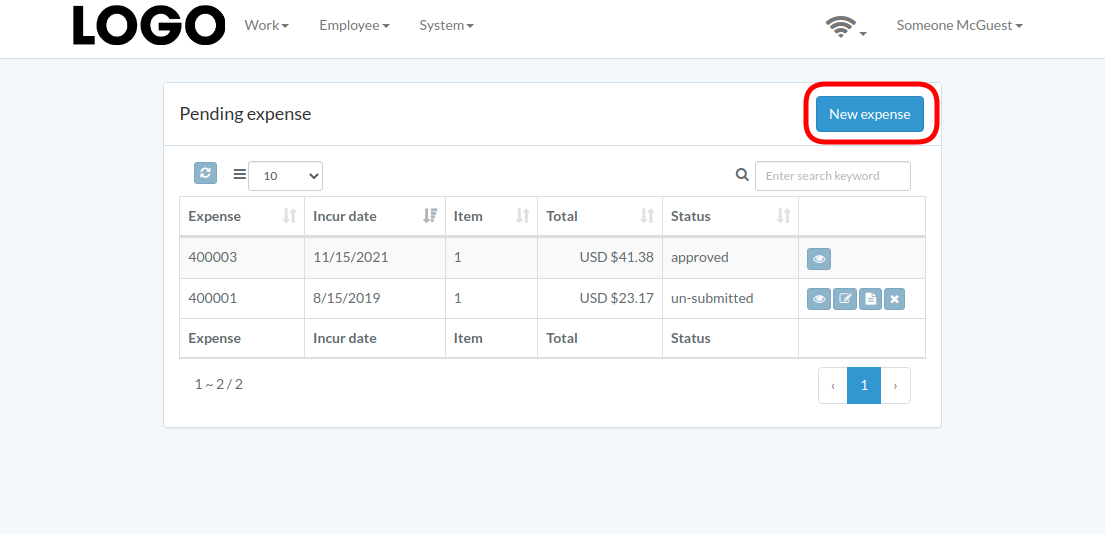
Click "New expense" on upper right corner of expense table
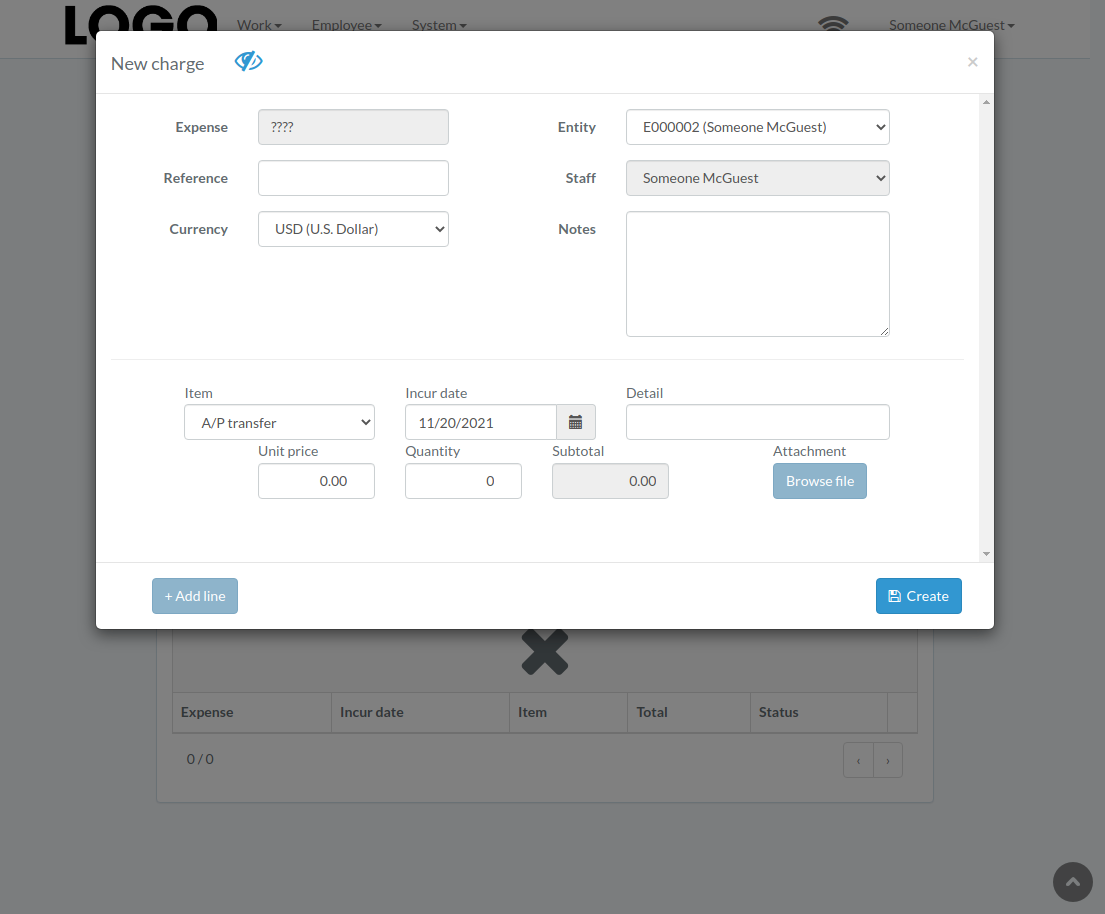
When expense modal appears, enter all information and click "Create" button.
Click "+ Add line" if needed
Update Expense
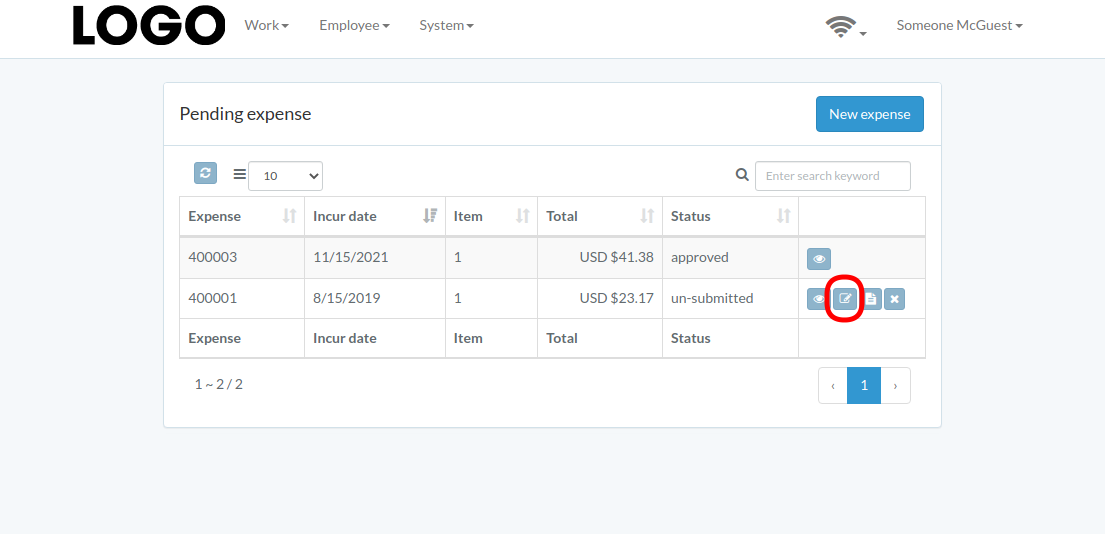
Click "Update" button on the right of expense
If no "Update" button, the expense can not be updated.
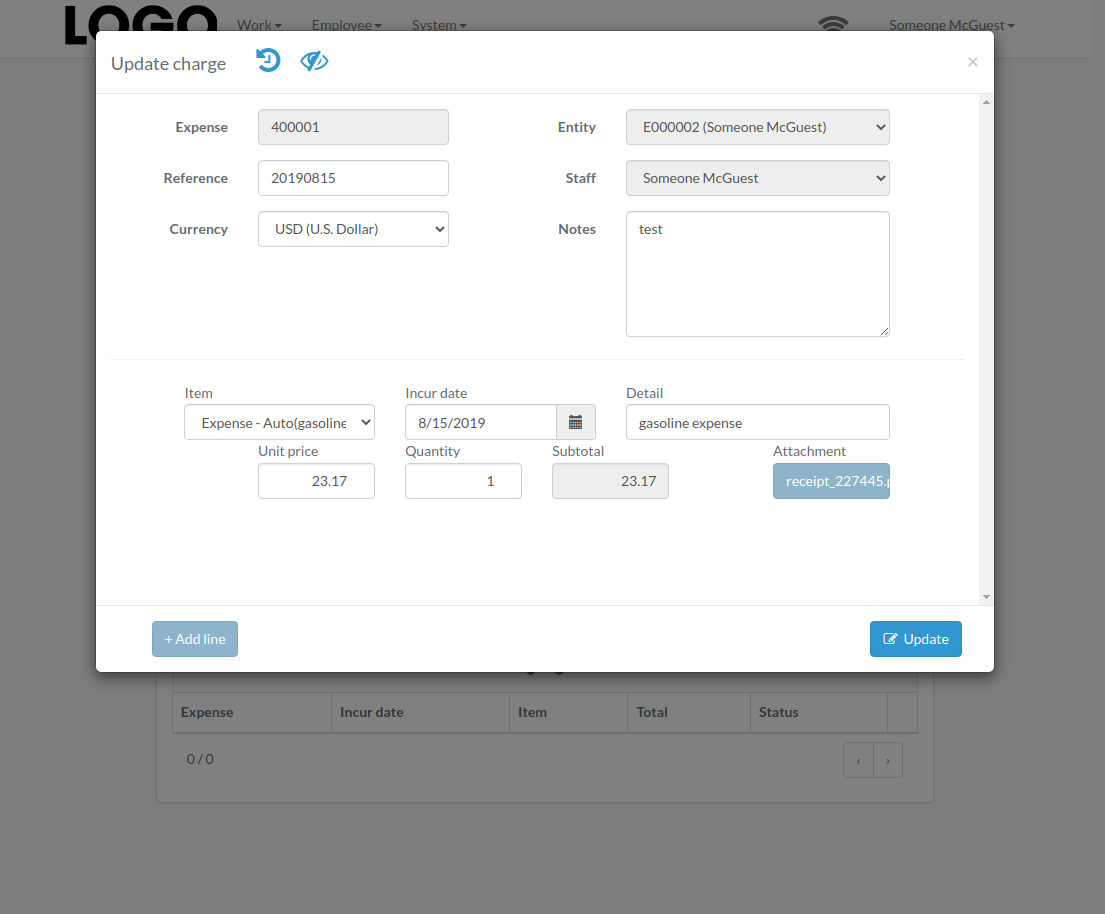
when expense modal appears, update expense data and click "Update" button
Click "+ Add line" if needed
View Expense
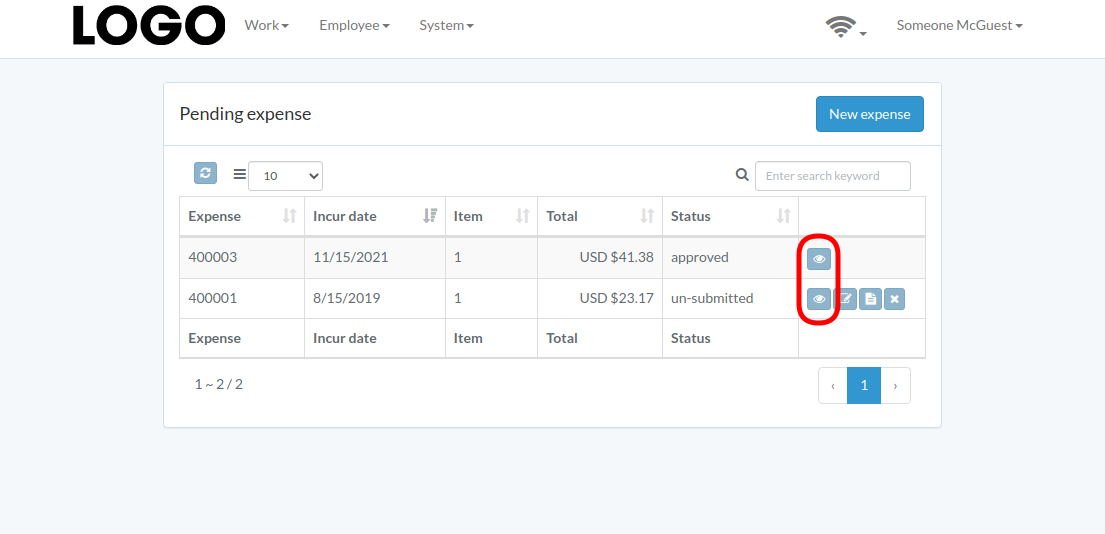
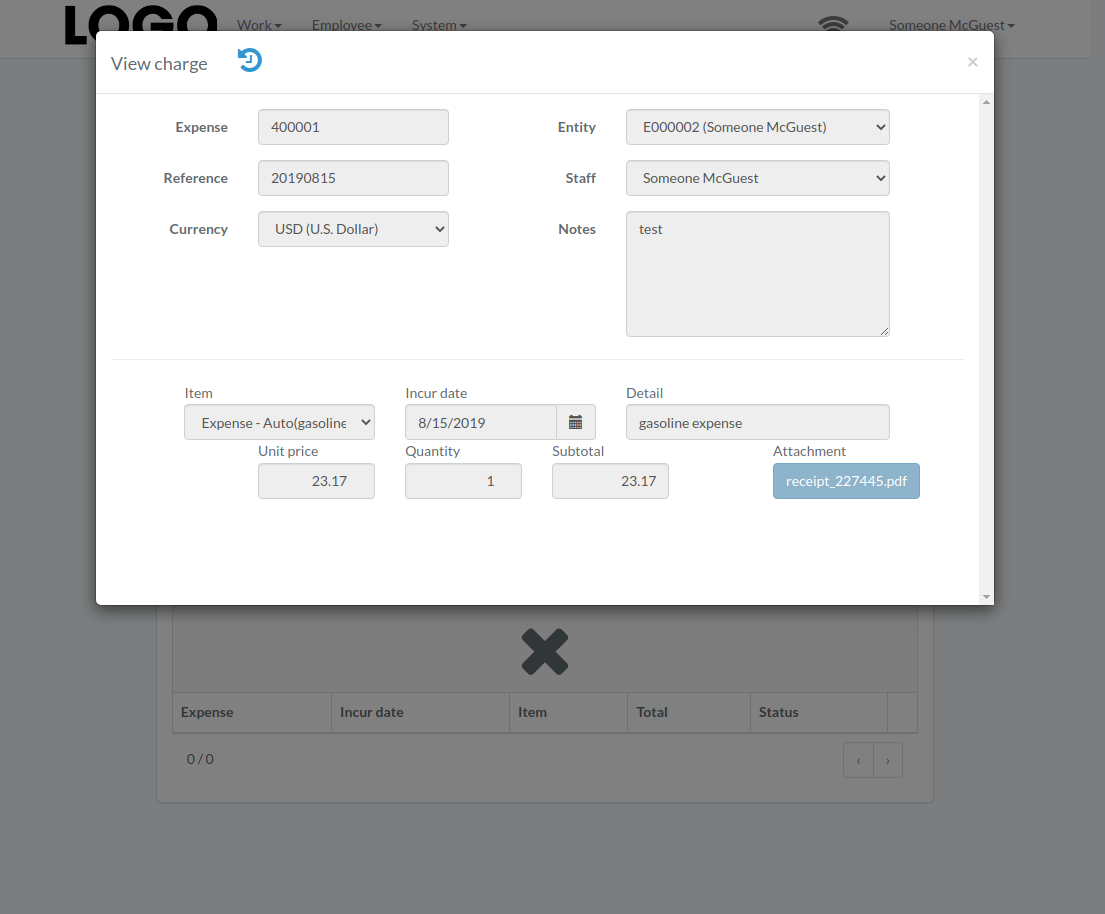
Expense modal appears
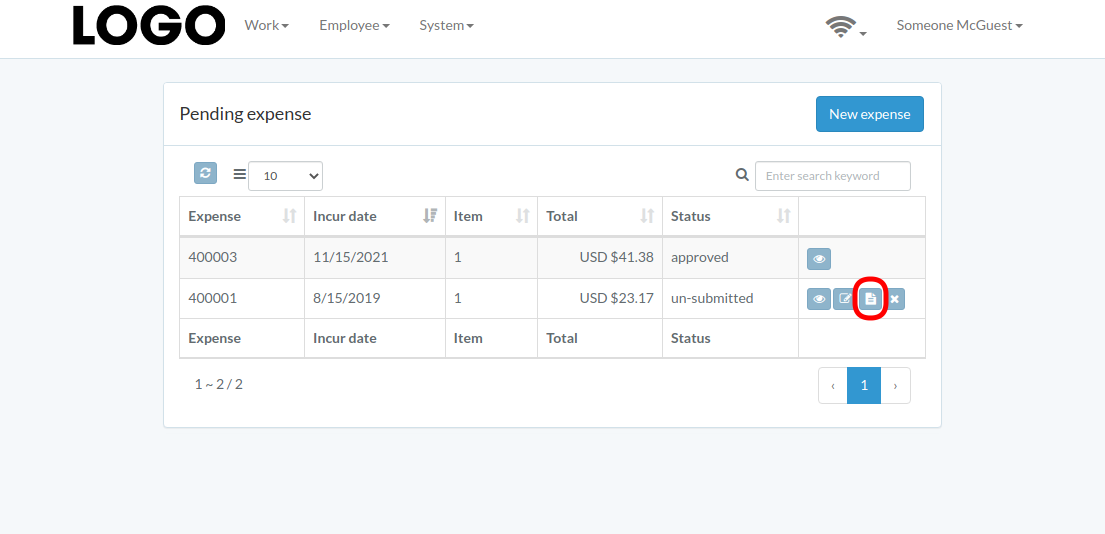
Submit Expense
Click "Submit" button on the right of expense
If no "Submit" button, the expense can not be submitted.
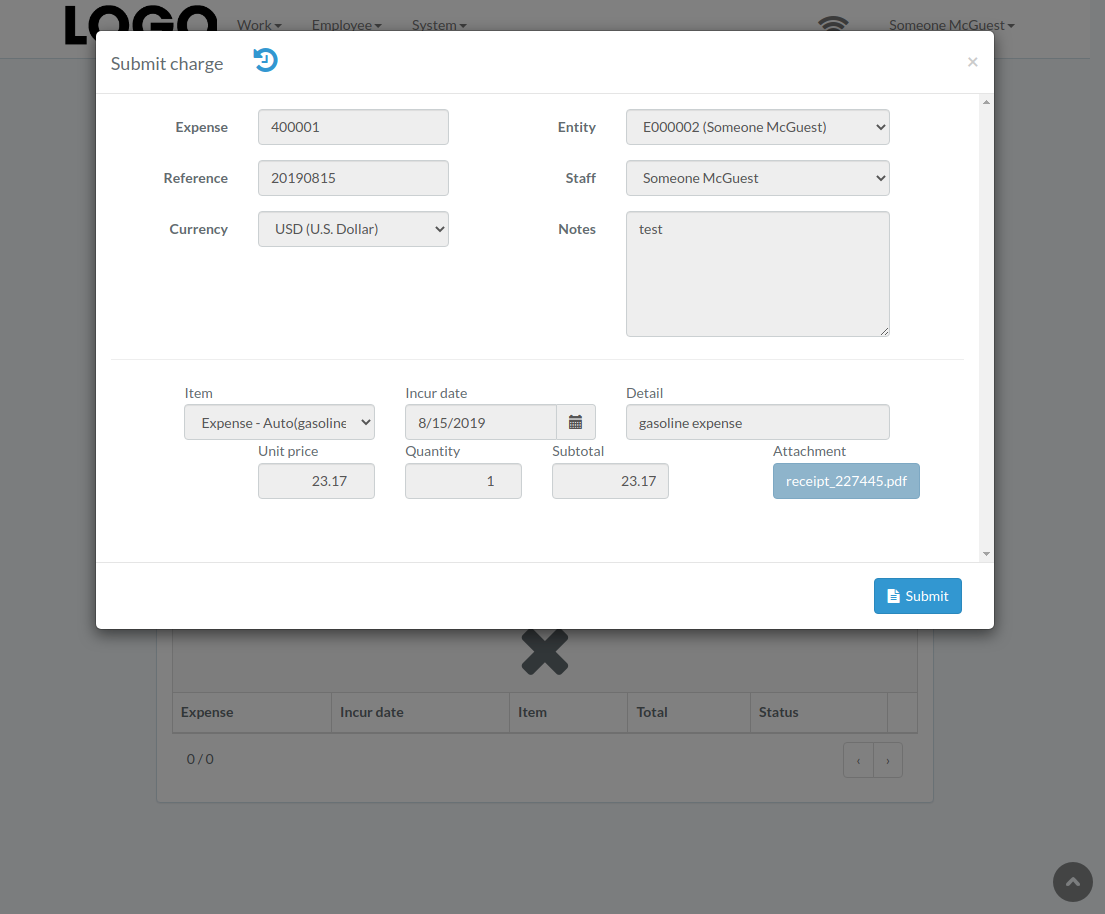
When expense modal appears, click "Submit" button to confirm submission
Retract Expense
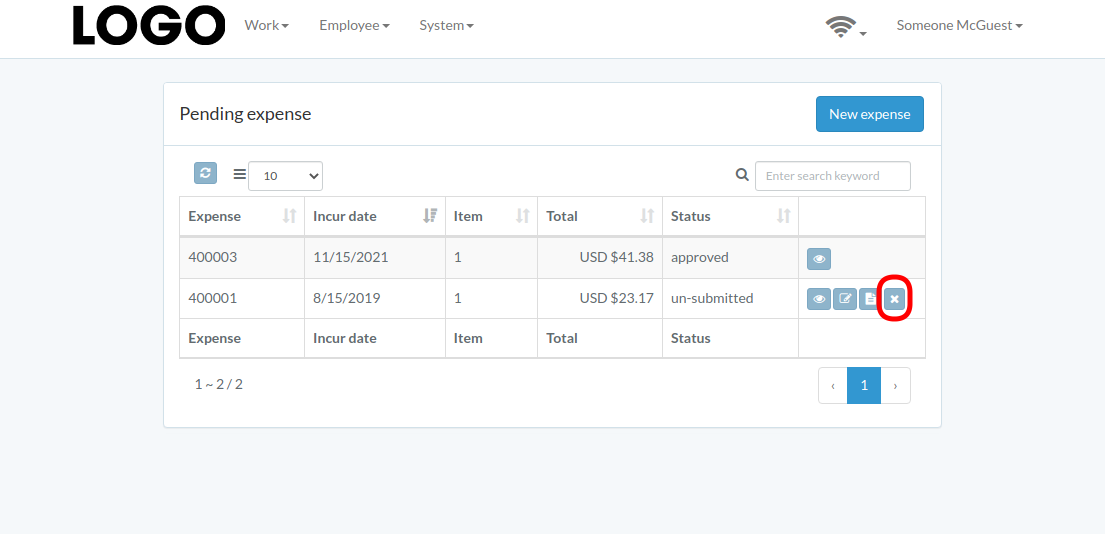
Click "Retract" button on the right of expense
If no "Retract" button, the expense can not be retracted.
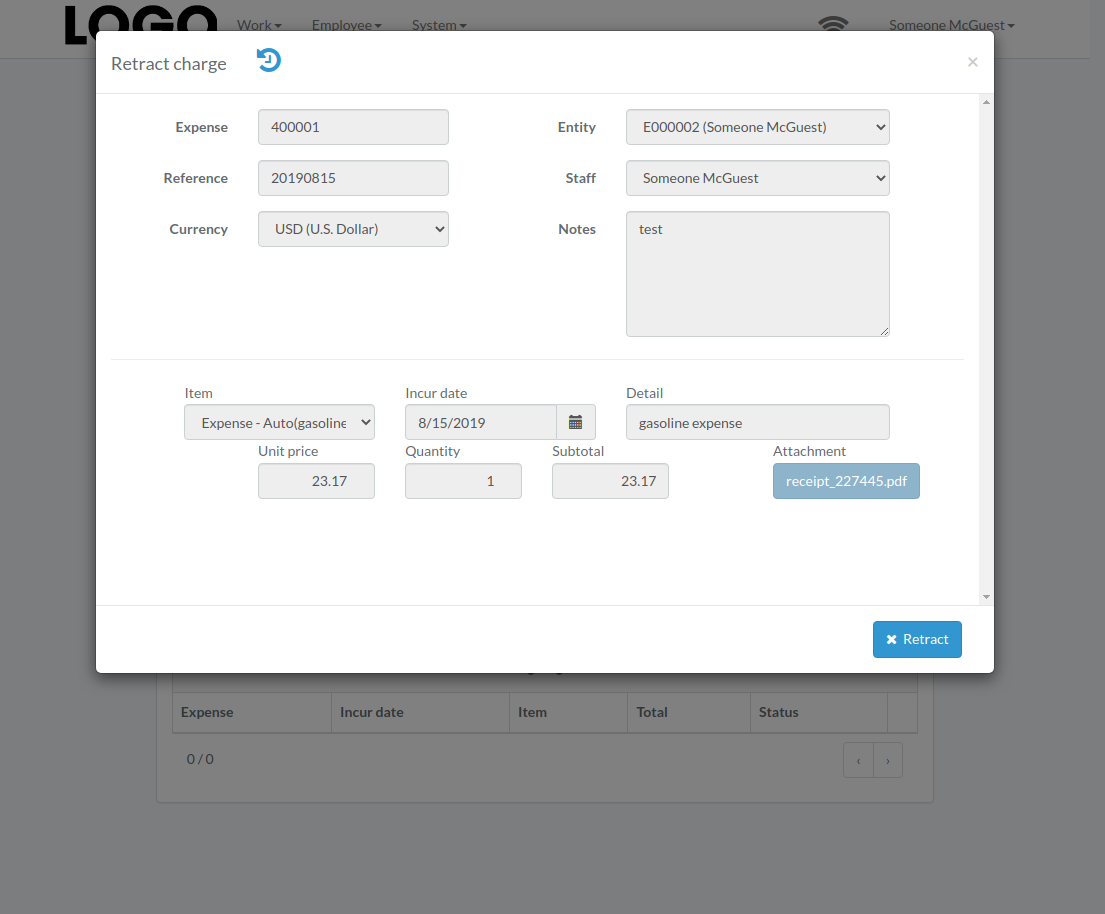
When expense modal appears, click "Retract" button to confirm retraction
Approve Expense
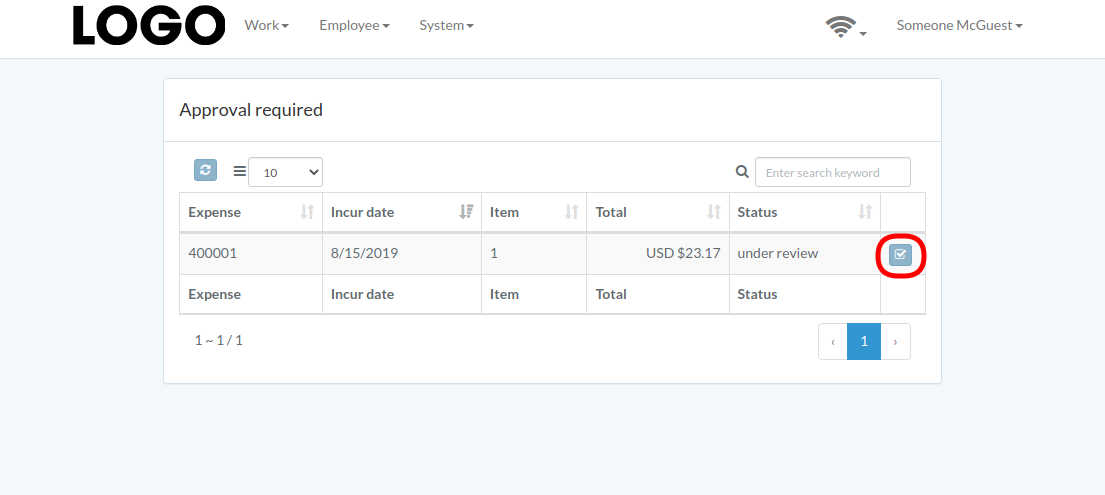
Click "Approve" button on the right of expense
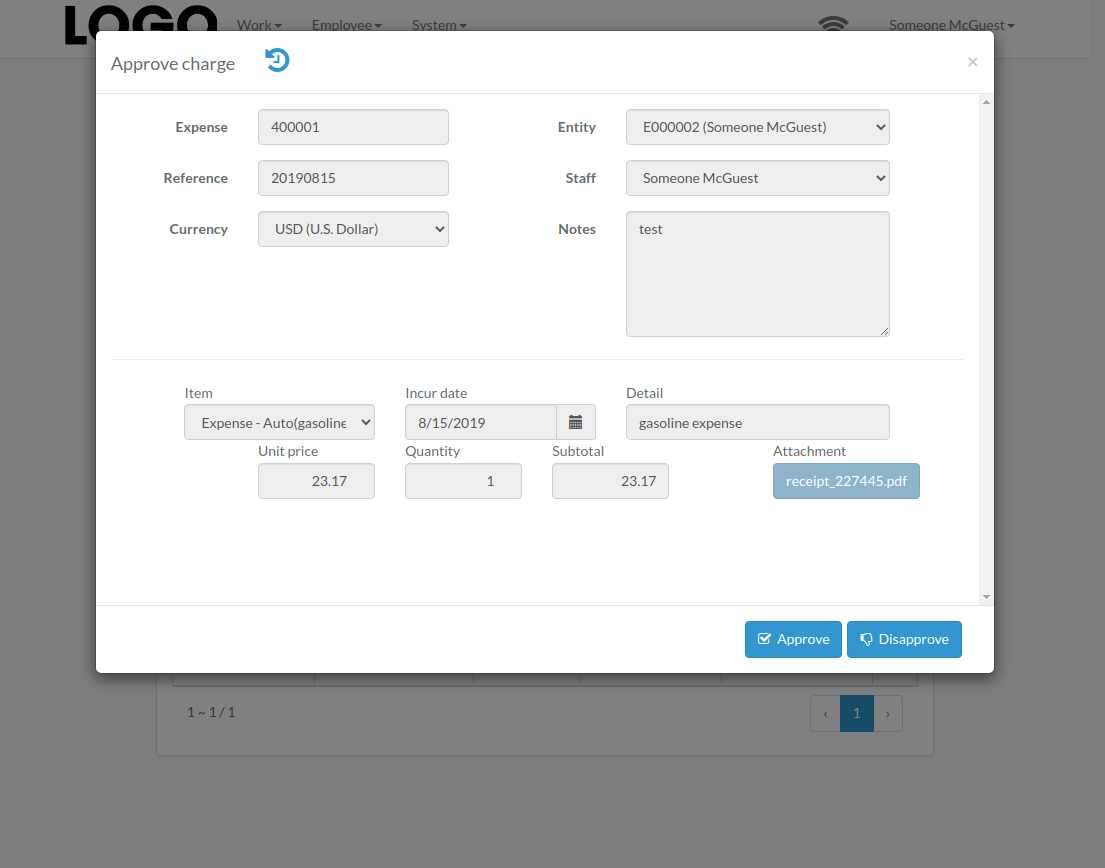
When expense modal appears, click "Approve" or "Disapprove" button to confirm
Recurring Expense
Introduction
Following shows a sample window.
The chapter describes features available within the window.

Create expense
Click "Record" button on the right of recurring expense
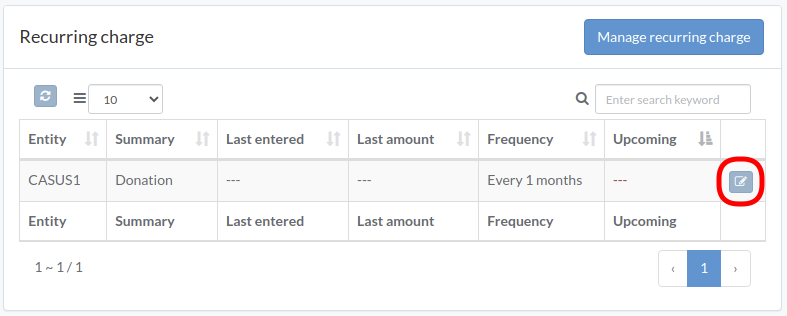
When expense modal appears, some fields are pre-filled; enter all information and click "Create" button.
Click "+ Add line" if needed
Manage recurring expense
Click "Manage recurring charge" on upper right corner of recurring charge table
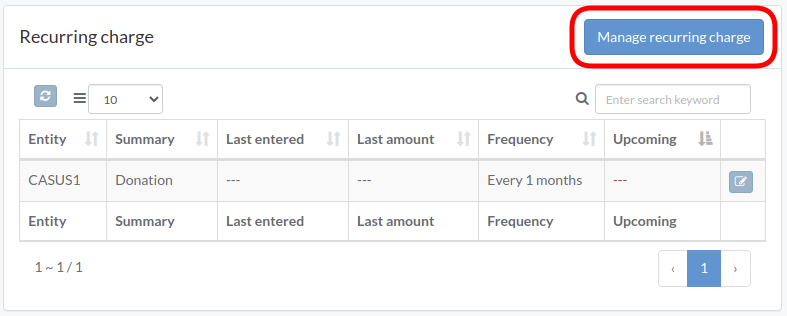
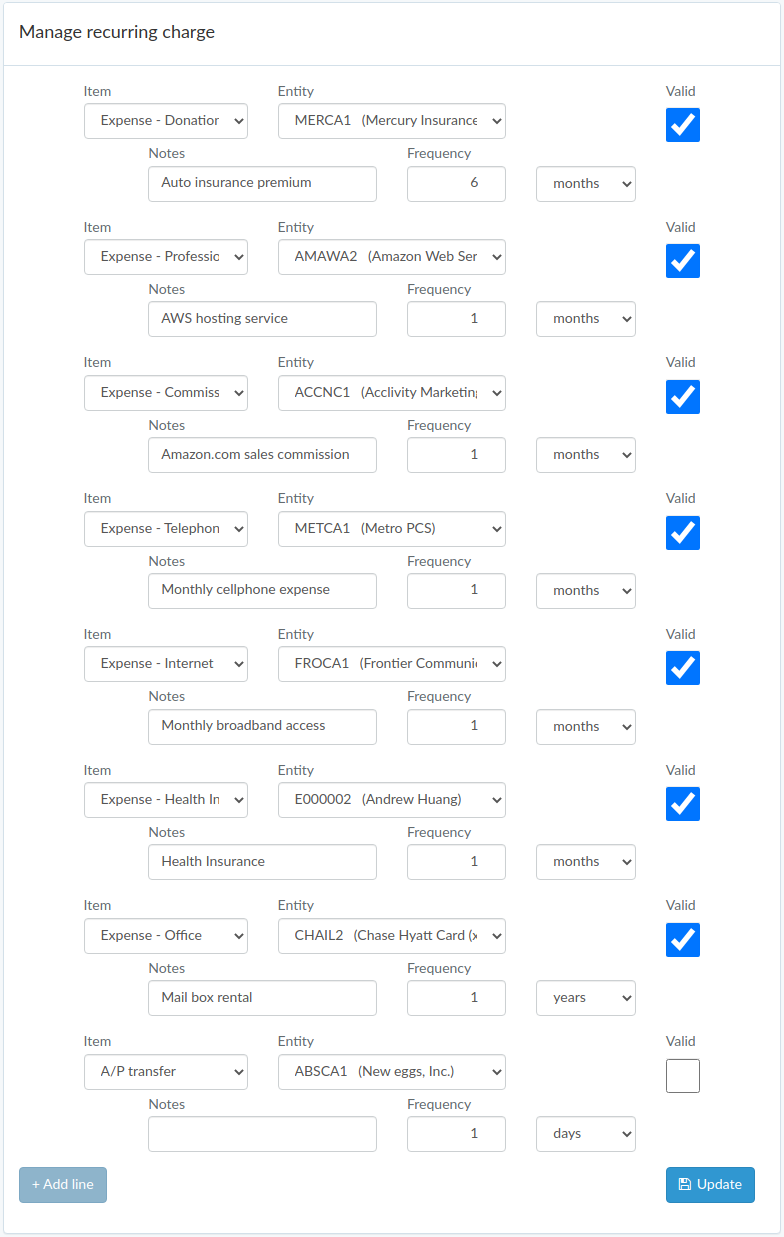
Enter item, supplier, description, frequency, and validity, then click "Update".
Click "+ Add line" if needed
Bank Account
Introduction
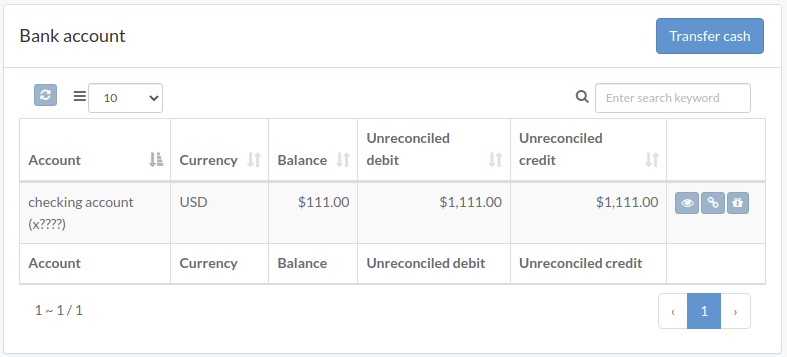
Following shows a sample window.
The chapter describes features available within the window.
Cash Transfer
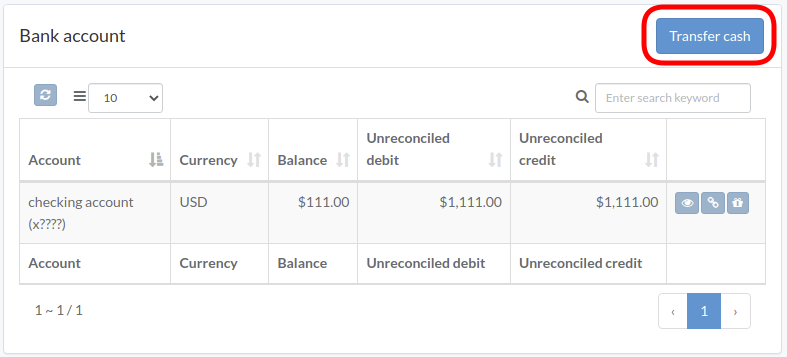
Click "Transfer Cash" on upper right of the window
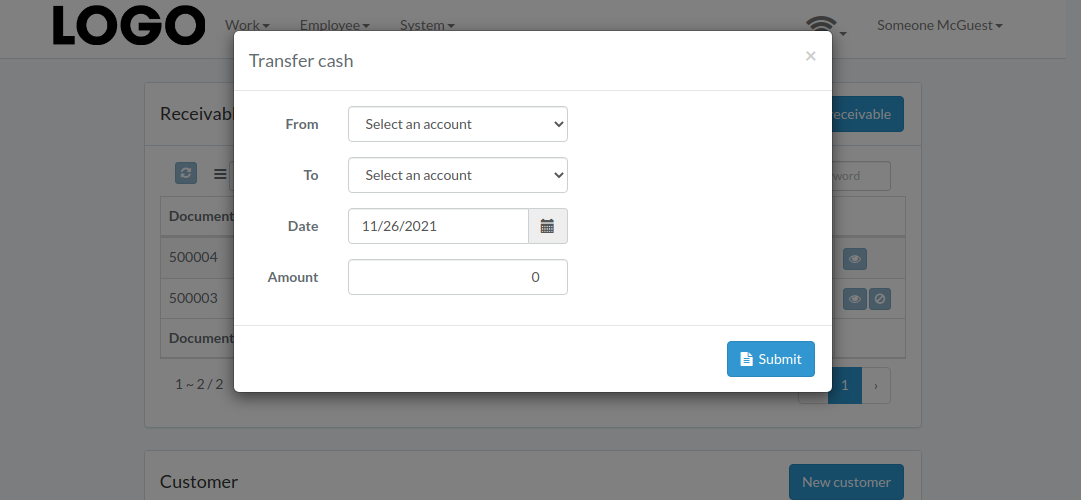
Enter From/To account, date, and amount, then click "Submit"
View Transaction
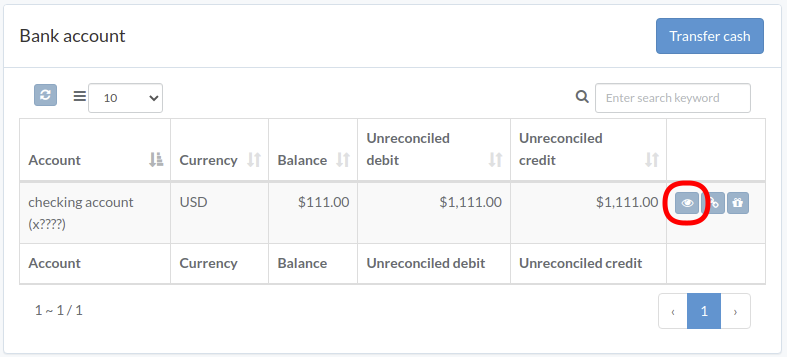
Click "View" to the right of the bank account
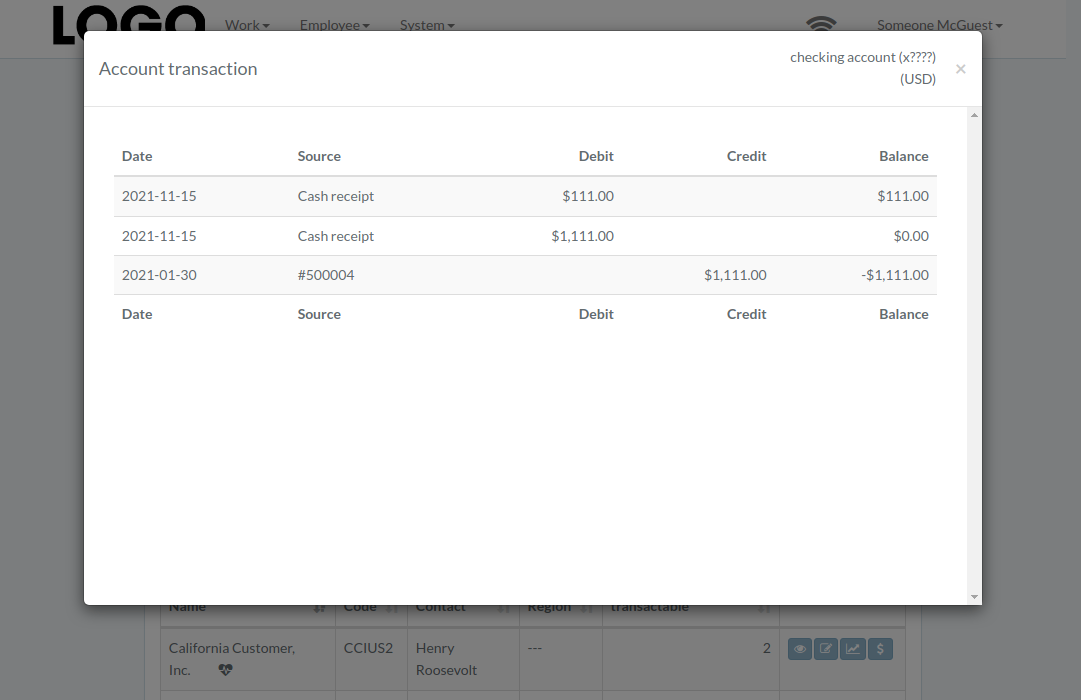
Transaction modal appears
Reconcile Transaction
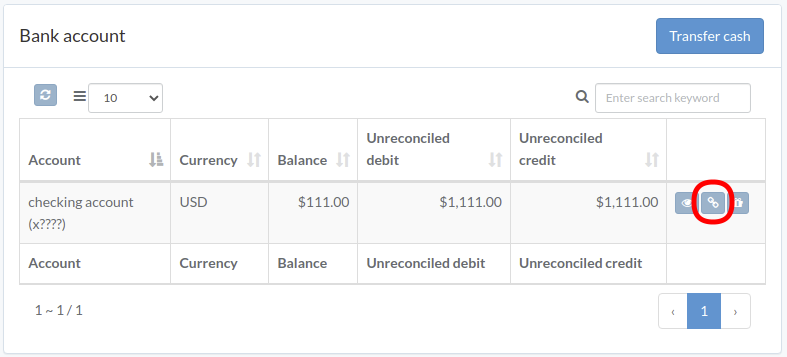
Click "Reconcile" to the right of the bank account
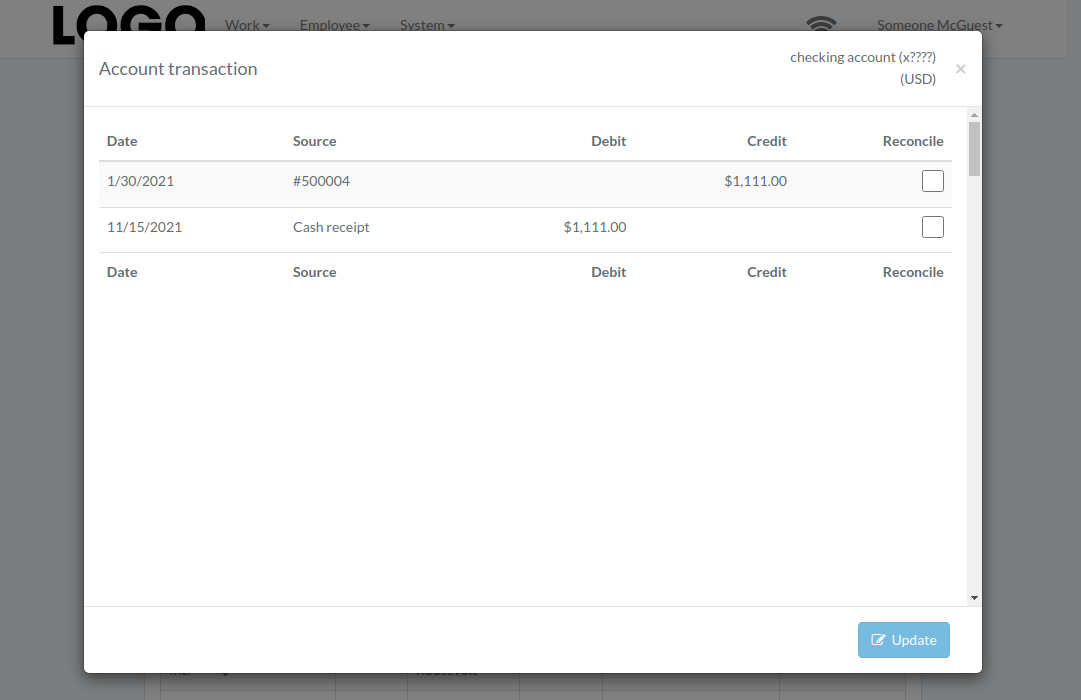
Check boxes on right of the transaction. Click "Update" when finished.
Record Dividend
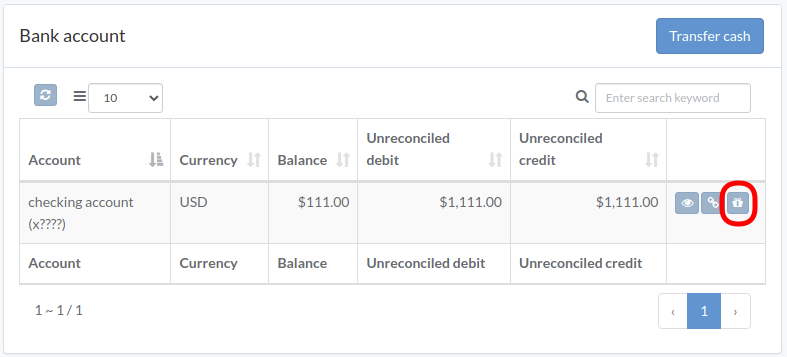
Click "Record Dividend" button to right of the account
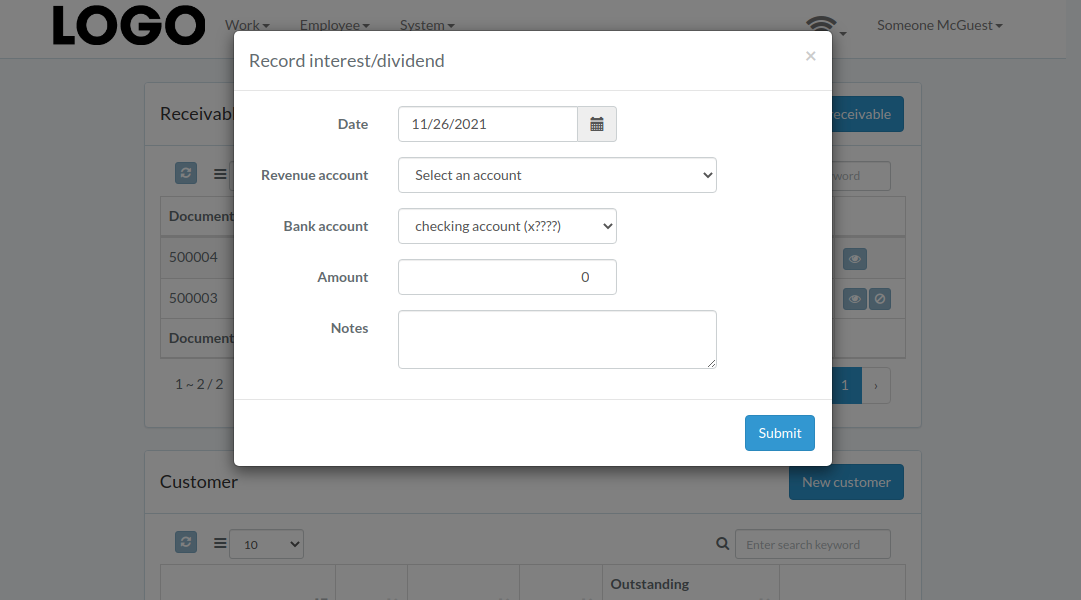
Enter date, revenue/bank account, amount, etc. Then click "Submit"
Loan
Introduction
Following shows a sample window.
The chapter describes features available within the window.
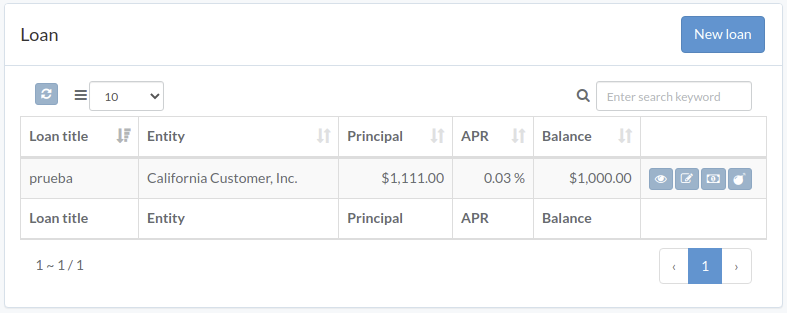
Create loan
Update loan
View loan
Record interest
Bad debt
Investment
Introduction
Create investment
Update holding
View investment
Report
Introduction
Following shows a sample window.
The chapter describes features available within the window.
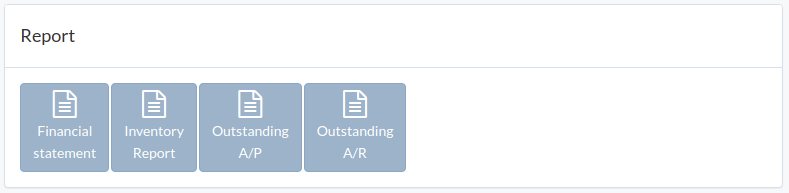
Finance Report
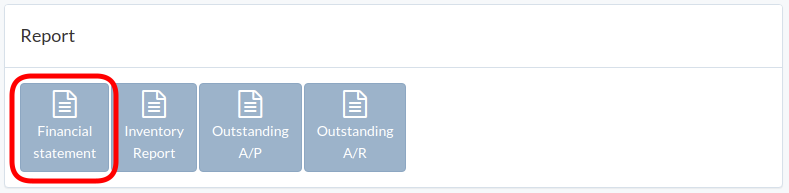
Click "Finance Statement"
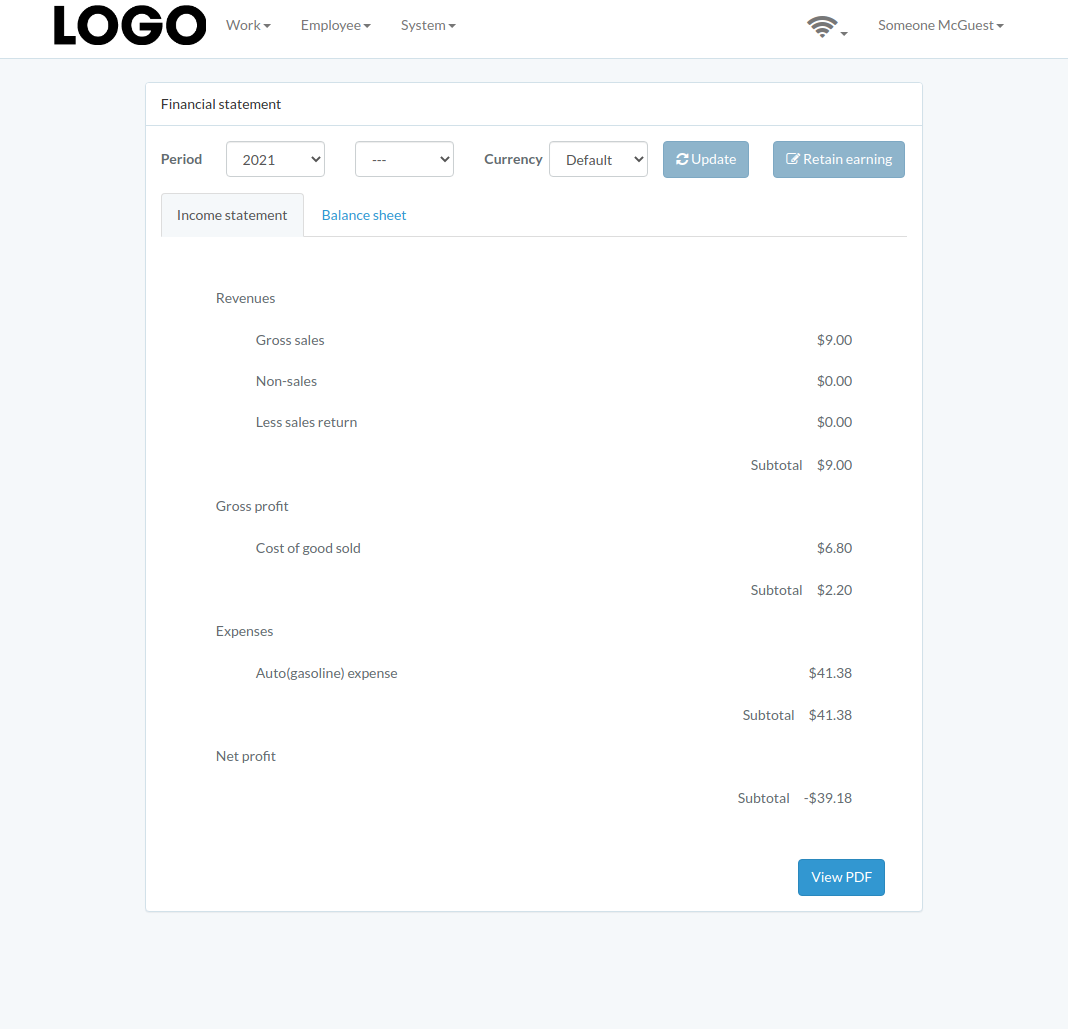
Enter period and currency, then click "Update"
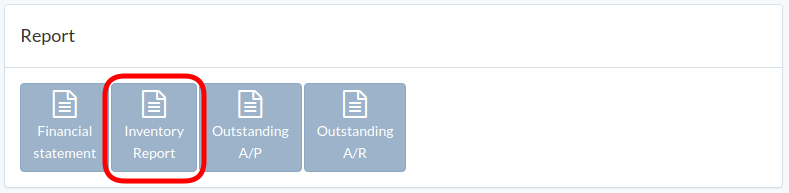
Inventory Report
Click "Inventory Report"
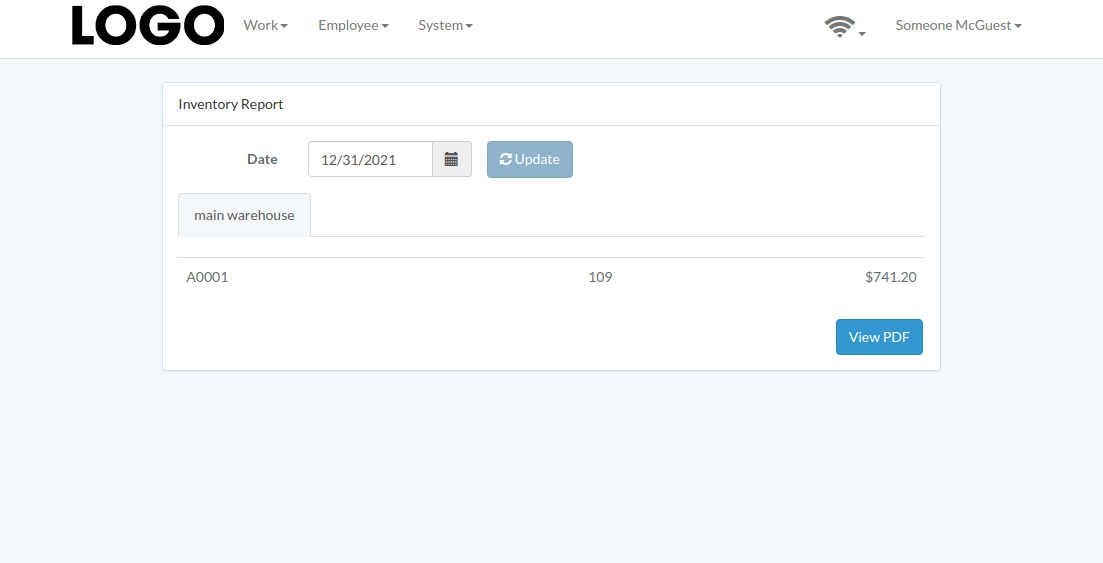
Select date and then click "Update"
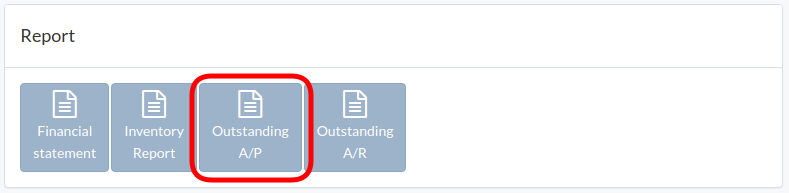
Outstanding A/P
Click "Outstanding A/P"
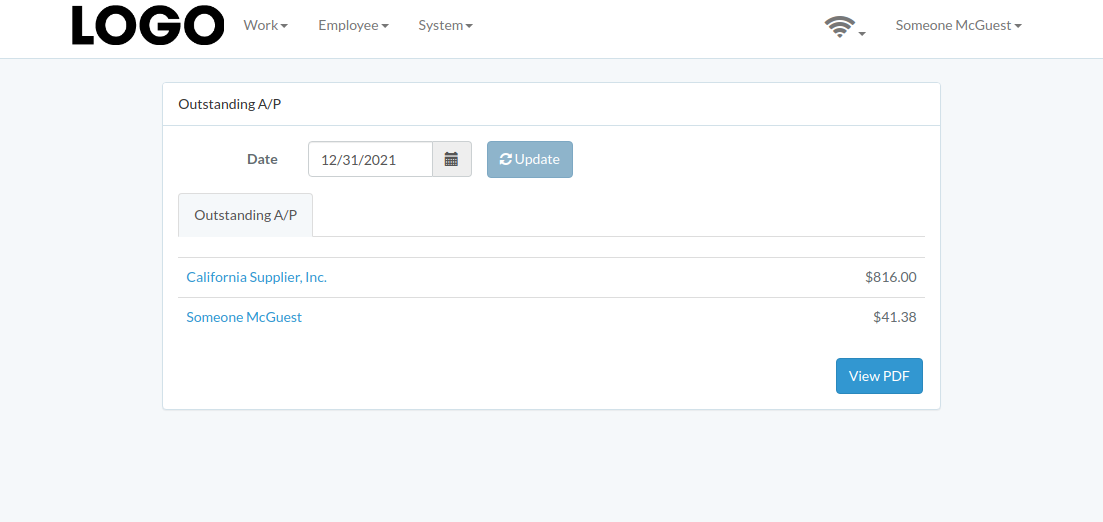
Select cut-off date and then click "Update"
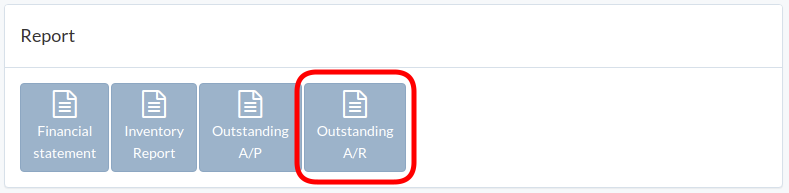
Outstanding A/R
Click "Outstanding A/R"
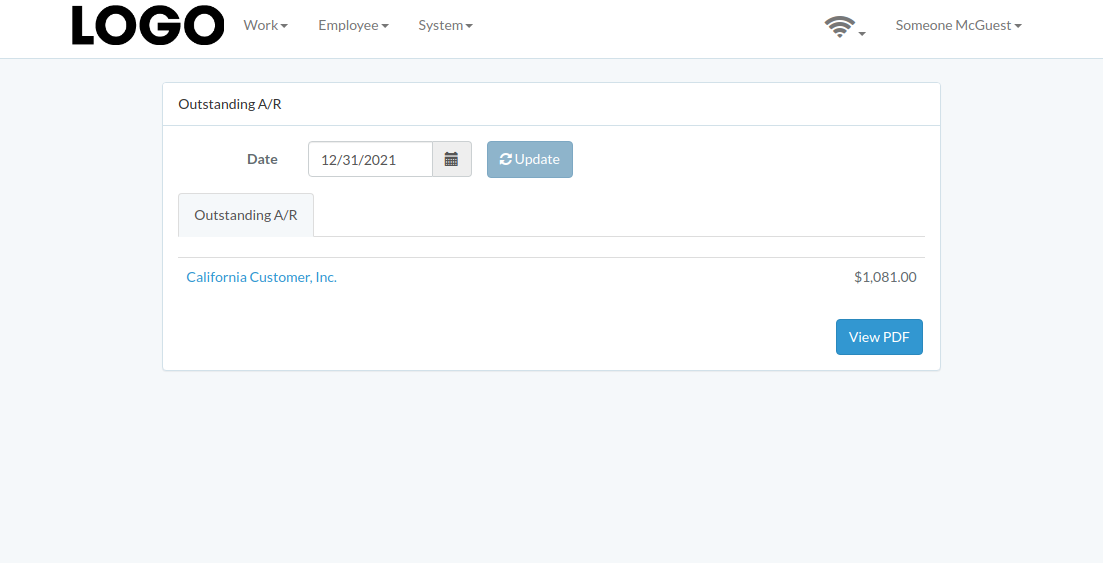
Select cut-off date and then click "Update"
Tool
Introduction
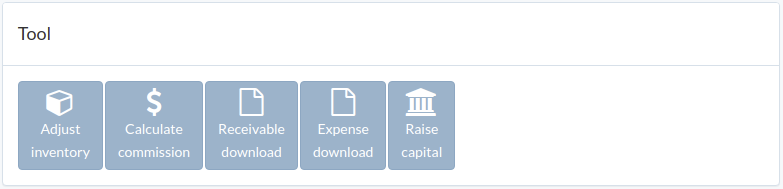
Following shows a sample window.
The chapter describes features available within the window.
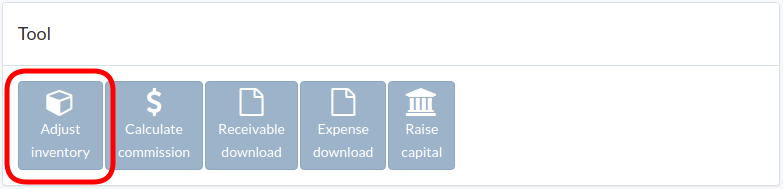
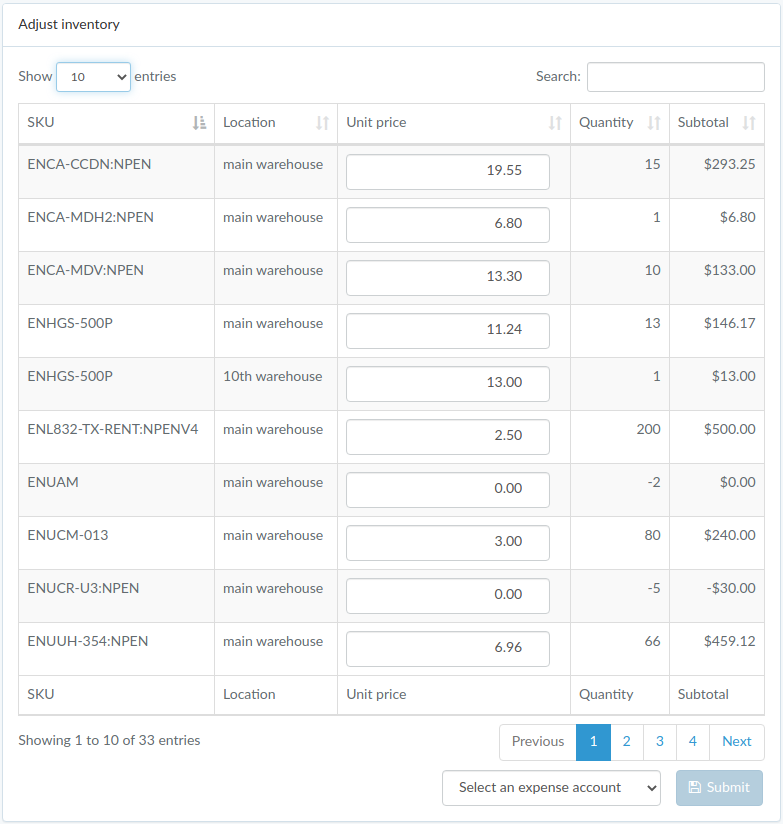
Adjust inventory
Click "Adjust inventory" in tool window
Update unit price, select an expense account, and click "Submit"
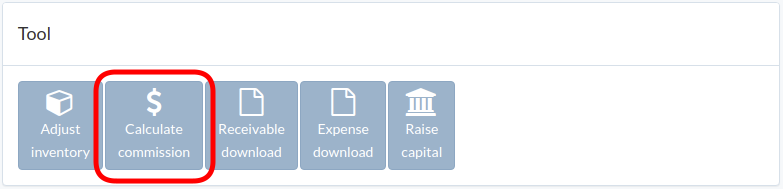
Calculate commission
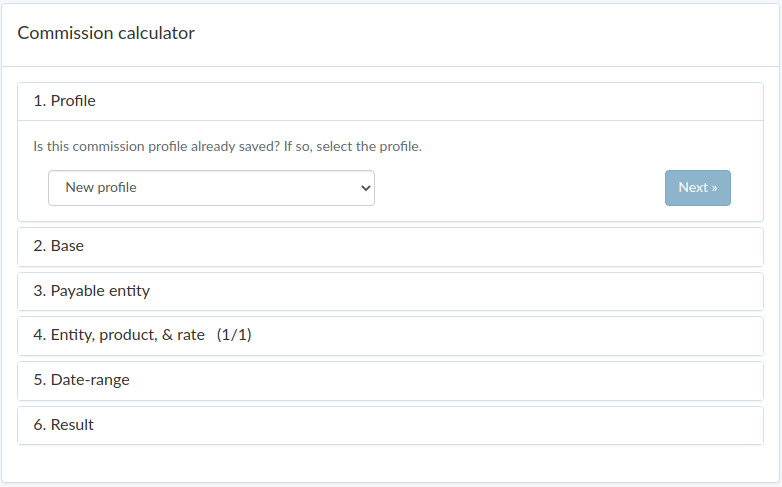
Click "Calculate commission" in tool window
Follow guided steps to calculate commission.
Confirmed result can be converted into expense on last step.
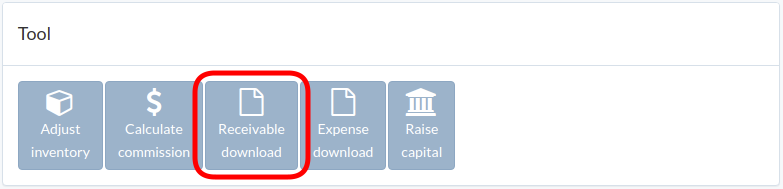
Receivable download
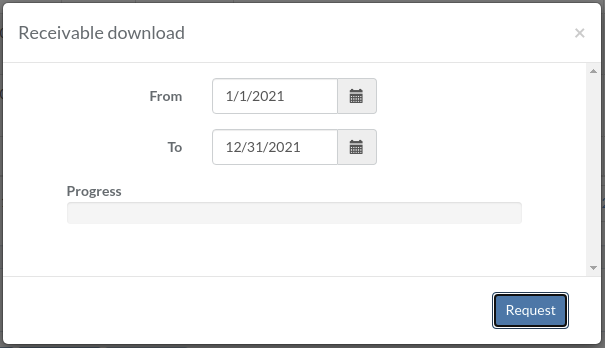
Click "Receivable download" in tool window
Select date range, and click "Request"
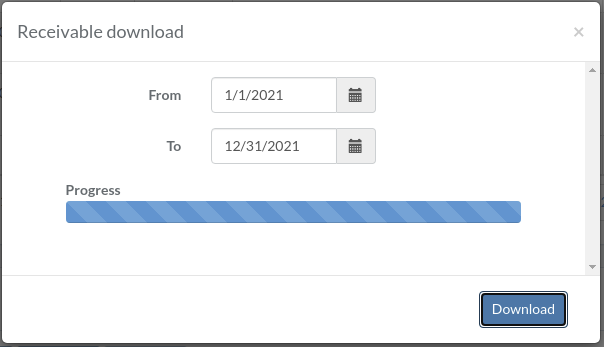
After progress is completed, click "Download" to download zipfile
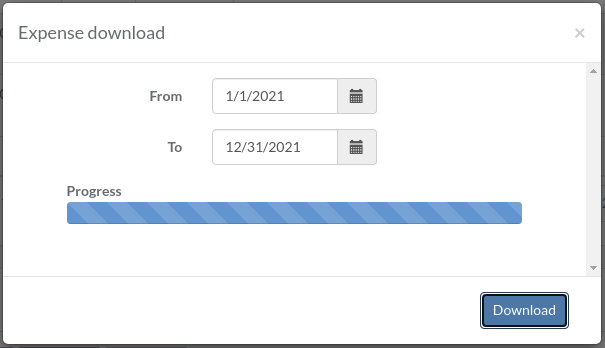
Expense download
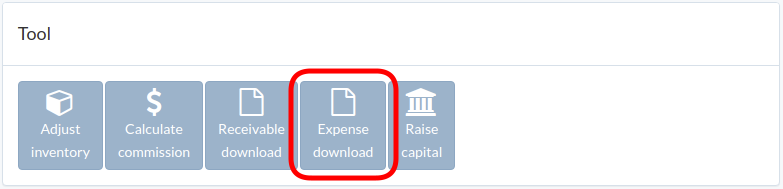
Click "Expense download" in tool window
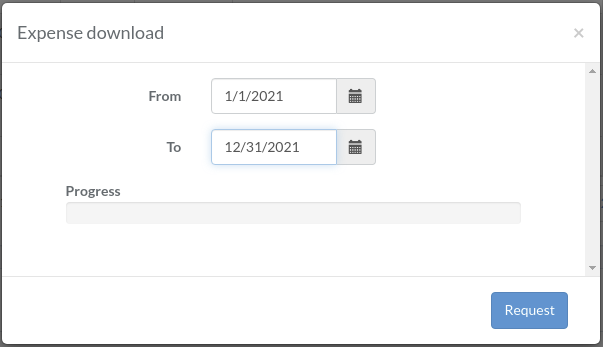
Select date range, and click "Request"
After progress is completed, click "Download" to download zipfile
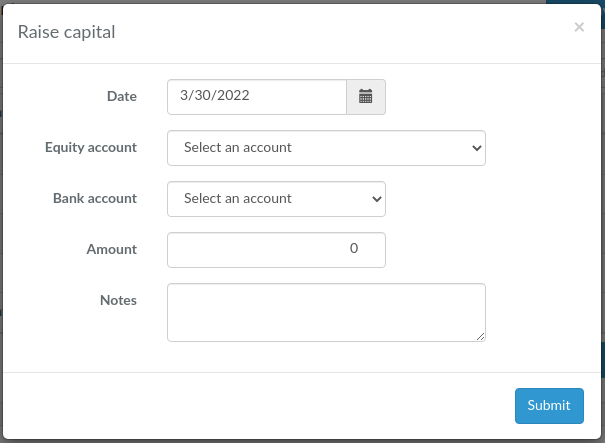
Raise capital
Click "Raise capital" in tool window
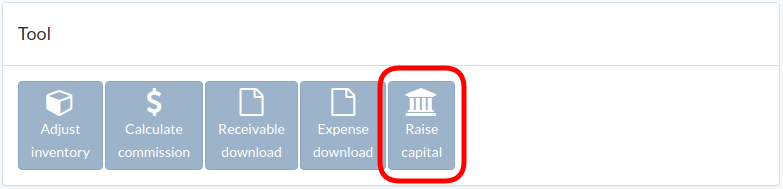
Select date, equity account, bank account, amount, and click "Submit"